Monday, January 31, 2011

Warm Pear-Potato Salad

This dish is meant to accompany Marcus Samuelsson's Maple Glazed Tuna.  Pear and potato might sound like an odd combination, especially when you add curry to the mix, but trust me, it all works!
 
PEAR-POTATO SALAD
Makes 4 servings

1/4 cup extra virgin olive oil
1 pound Yukon Gold potatoes, peeled and cut into quarters or 1/2-inch pieces
2 Bosc pears (ripe but firm), peeled, cored and cut into 1-inch cubes
1/2 red onion, thinly sliced
1 garlic clove, minced
1/4 cup slivered almonds, roughly chopped
1 1/2 teaspoons curry powder
salt and freshly ground black pepper
juice of 1 lemon
1 cup shredded baby spinach


1.      Heat the olive oil in a large sauté pan over medium heat. Add the potatoes and sauté until golden, about 12 minutes.
2.      Add the pears, onion, garlic, almonds, and curry powder and sauté for 5 minutes.
3.      Remove from the heat and season with salt and pepper. Toss with the lemon juice and spinach.

from New American Table by Marcus Samuelsson
getting golden
done

Sunday, January 30, 2011

Maple Glazed Tuna

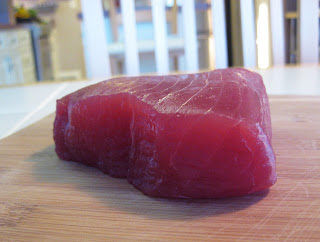
I know some of you out there might look at this tuna and think it's undercooked. But this is how tuna should be done (even rarer would be good, but I lost track of time while snapping some photos of it cooking in the pan). I was a little weary the first time I made it this way, but once I tasted it, I realized all my past tuna steaks were overdone and dry and this was the way to go. I know those of you who enjoy sushi won't feel the least bit uneasy.

This recipe is from chef Marcus Samuelsson. I've made several of his dishes and I've never been disappointed. The glaze has a nice sweet and sour quality. It's so good, we ended up drizzling it over our steamed broccoli and dipping our tuna in the leftover.
MAPLE-GLAZED TUNA
Makes 4 servings

glaze:
1 tablespoon Dijon mustard
2 tablespoons pure maple syrup
juice of 1 lime
1 tablespoon extra virgin olive oil

3 tablespoons extra virgin olive oil
4 (6-ounce) tuna fillets
salt and freshly ground black pepper
4 cilantro sprigs


1.      Whisk together all the glaze ingredients. Set aside.
2.      Season the tuna on both sides with salt and pepper. Heat 3 tablespoons olive oil in a large cast iron or heavy skillet over high heat. Add the tuna and cook for only 30 seconds on each side.
3.      Remove from the pan and brush both sides of the tuna with the maple-mustard glaze.
4.      Transfer to a serving platter and garnish with cilantro. Serve with Pear-Potato Salad.

from New American Table by Marcus Samuelsson
looking luscious
I accidentally put a little too much oil in the pan, but 
didn't use it all to cook the tuna (it doesn't take much)


Saturday, January 29, 2011

Anise-Almond Biscotti

I think these biscotti have just the right amount of anise flavor; it really shines through, but isn't totally overpowering. Of course if you like the anise more subtle, you can always add less. They're also not too sweet, perfect for having with coffee or tea. And because they can keep for 1-2 weeks, they make a nice gift. In fact, I mailed some to my sister Randi (ahem, that's your cue to leave a comment.)
ANISE-ALMOND BISCOTTI
Yield: about 5 dozen

4 1/2 cups unbleached all purpose flour
4 teaspoons baking powder
3 tablespoons aniseed (2 tablespoons ground + 1 tablespoon left whole)
1 teaspoon salt
2 sticks unsalted butter, softened
1 3/4 cups sugar
4 large eggs
1/3 cup Sambuca or Pernod (licorice liquor)
1 teaspoon anise extract
1 teaspoon almond extract
1 teaspoon vanilla extract
1 cup toasted whole almonds (unsalted), roughly chopped or left whole


1.      Preheat oven to 350° F. Line 2 baking sheets with parchment paper.
2.      Mix flour, baking powder, aniseed and salt in a bowl; set aside.
3.      Combine Sambuca and all the extracts in a small bowl; set aside.
4.      Beat butter and sugar in large bowl until light and fluffy. Add eggs one at a time, beating well after each addition. Add the dry ingredients and liquid ingredients, alternating between the two (starting and ending with the dry ingredients).  Stir in the almonds until well mixed.
5.      Using moistened fingertips, divide the dough into quarters, forming each quarter into a smooth 13-inch long, 2-inch-wide log (2 per baking sheet). Bake until lightly golden and firm, about 40 minutes. Cool for about 20 minutes.
6.      Reduce oven temperature to 300° F.
7.      Transfer cooled logs to a cutting board. Using a serrated knife, cut the logs on the diagonal into 1/2-inch to 3/4-inch thick slices. Arrange slices, cut side down, on baking sheets.
8.      Bake for 15 minutes. Turn biscotti over and bake just until they begin to color, about 15-20 more minutes.  Cool.  Can be made up to 2 weeks ahead (store in an airtight container at room temperature).

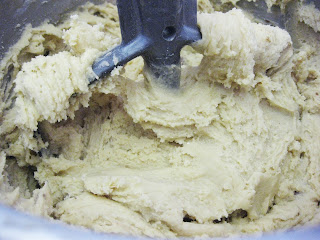
dough mixing
dough with almonds added
dough separated roughly into quarters
raw logs before baking
cutting baked log

Mine did get a few cracks, but that's okay (I've never
seen anyone turn down biscotti because of a crack).
ready for the second baking (I was told by my friend
Elizabeth that biscotti means "twice baked")

I have a separate coffee grinder just for herbs & spices (anise might taste nice with coffee, but I'd rather not have a cup of cumin coffee). As you can see, I've taken precautions to make sure that doesn't happen (I bought two different colors and labeled the one for herbs so there's no mix up).
ground aniseed

Friday, January 28, 2011

Malted Waffles

When I woke up yesterday morning to a spectacular winter wonderland outside my window (19.1 inches total), my first thought was how gorgeous!  My second, less upbeat thought was damn, another snow day off from school, how am I going to get any work done?!  

After absorbing that reality for a minute or two, I quickly shifted gears. My third, more optimistic thought was I think we might have all the ingredients to make waffles. Luckily, we did. So with things looking up, I dug out the old waffle iron and enlisted the help of my lovely assistant. 

Those waffles were great fuel, they kept me going through shoveling and two snowball fights.
 
MALTED WAFFLES
Yield: about 8 (4” x 4”) waffles

1 3/4 cups whole milk
2 large eggs
6 tablespoons unsalted butter, melted and slightly cooled
1 1/2 cups all purpose flour
1/4 cup malt powder (or another 1/4 cup flour, of course the waffles won't be malted)
2 tablespoons sugar
1 1/2 teaspoons baking powder
1/2 teaspoon salt
melted coconut oil or canola oil for brushing waffle iron (only if it isn’t non-stick)


1.      Whisk milk, eggs, and melted butter in a large bowl to blend. Add flour, malt powder, sugar, baking powder, and salt; whisk until batter is smooth. If the batter is too thin, add a few more pinches of flour.  Can be made 1 hour ahead; let batter stand at room temperature.
2.      Heat waffle iron according to manufacturer's instructions. If your waffle iron isn’t non-stick, brush lightly with oil. Pour enough batter onto each waffle grid to cover generously, about 1/2 cup each (the amount depends on the size of your waffle iron). Close waffle iron and cook until waffles are golden brown and crisp on both sides, 5 to 6 minutes.
3.      Serve waffles with pure maple syrup and fresh fruit (or desired toppings).

adapted from Yves Camdeborde

my helper, whisking the batter (wearing a Louisiana State
University cheerleading uniform her Aunt Randi gave her)
pouring the batter
peeking in (almost done)
with maple syrup


Thursday, January 27, 2011

Easy Chicken Masala

I love dishes where I can do most of the work ahead of time. It feels like someone else cooked dinner for me, which always make the food taste even better somehow. I even sliced the onions for this the day before and just popped it all in the oven when I got home from work. My husband Chuck did make the brown rice...it came out great, but from the look of pride on his face, you'd think he harvested it himself (love you honey).

EASY CHICKEN MASALA
Yield: 4 servings

1 cup plain whole Greek yogurt
1/4 cup coarsely chopped fresh cilantro
3 tablespoons extra virgin olive oil
1 tablespoon garam masala (Indian spice mixture available at most supermarkets)
2 teaspoons coarse kosher salt
1 large garlic clove, pressed
8 boneless, skinless chicken thighs, about 1 ¼ lb. (can also use bone-in, skin on)
2 small onions, sliced 1/4-inch thick


1.      Mix yogurt, cilantro, olive oil, garam masala, salt, and garlic in a glass baking dish (large enough to hold all the chicken in a single layer). Add chicken to marinade, 1 piece at a time, coating all sides. Cover with plastic wrap; refrigerate for at least 2 hours or overnight.
2.      Preheat to 400° F.
3.      Arrange onions in thin layer on large rimmed baking sheet to form bed for chicken. Top with chicken pieces in single layer, spacing apart for even roasting (chicken will still be coated with marinade). Discard remaining marinade.
4.      Roast chicken until cooked through and juices run clear when thickest portion of thigh is pierced with knife, about 30-40 minutes (40-50 minutes for bone-in).
5.      Serve chicken atop onion slices. Spoon pan juices around.

adapted from Maria Helm Sinskey

marinade before mixing
Chicken covered with marinade. I like to use Greek yogurt because 
it's very thick and really clings to the chicken (for maximum flavor).
raw marinaded chicken on onion slices
done


Wednesday, January 26, 2011

Carrot Soup

I'd like to take this opportunity to sing the praises of the immersion blender. I don't know if you've noticed, but I use mine quite a bit, especially during soup season. But it's great all year round (for example, I use it for tomato sauce and pizza sauce regularly). I don't know if you've ever pureed hot soup or sauce in a blender, but it's extremely messy and usually has to be done in batches. What a giant pain. Not to mention it often ends up with me burning myself. I hope I'm not making you feel bad if you don't have an immersion blender, that's not my intention at all. I would just like for you to consider acquiring this handy dandy kitchen tool and make your life a little easier. You deserve it. Oh yeah, and the carrot soup is really good too (even if it does resemble baby food a little).
CARROT SOUP
Yield: 8 cups (4-6 servings)

4 tablespoons unsalted butter (or olive oil)
2 cups chopped white onion
2 lb. large carrots, peeled and cut into 1/2-inch pieces (about 5 1/3 cups)
5 cups low-sodium chicken broth
2 tablespoons honey
2 teaspoons freshly squeezed lemon juice
1/4 teaspoon ground cumin
1/4 teaspoon ground allspice
salt and freshly ground black pepper


1.      Melt butter in large pot over medium-high heat. Add onions and sauté for 2 minutes.
2.      Mix in carrots. Add broth and bring to boil. Reduce heat, cover, and simmer until carrots are very tender, about 20 minutes.
3.      Remove soup from the heat. Puree using an immersion blender until smooth.
4.      Whisk in honey, lemon juice, cumin and allspice. Season to taste with salt and pepper.  Serve hot.
adapted from Bon Appétit, April 2010
whole, peeled (and organic)
chopped
the immersion blender is also known as the thunderstick at our house
(Chuck has a real knack for naming and renaming stuff)

The Cuisinart SmartStick is a good immersion blender and not too expensive (less than $25 when I wrote this). I had one for many years before it finally gave out. Now I have a Kitchen Aid, which costs a little more, but luckily I got it on sale. It's nice because it has different speeds (which isn't totally necessary, but cool). It doesn't go up to eleven.

Tuesday, January 25, 2011

Baked (or not) Mashed Potatoes

This is a convenient way to make mashed potatoes if you want to do them ahead and then bake them right before your meal. I don't use this method if I'm making a small batch to eat right away.  I do the usual: potatoes, butter, milk, salt. Very simple. But this is great for holidays or large dinners...or if your cholesterol is low and you need to get more cream cheese into your diet. (Do people like that even exist?)
 
BAKED MASHED POTATOES
Yield: 9-10 servings

5 pounds Yukon Gold potatoes, cut into large chunks
4 cloves garlic, minced
4 teaspoons “Better Than Bouillon” chicken base (or 4 cubes chicken bouillon)
4 tablespoons butter
8 oz. reduced-fat cream cheese (also known as neufchatel), softened
1 tablespoon onion juice (grate ½ a small onion, then squeeze out the juice)
salt and freshly ground black pepper to taste


1.      Place the potatoes in a large pot and cover with water by 2 inches.  Bring to a boil; add garlic and bouillon and cook until potatoes are tender but firm, about 15 minutes.
2.      Drain potatoes, reserving 2-3 cups of the cooking water.
3.      Return potatoes to the pot.  Add butter, cream cheese and onion juice.  Mash with a potato masher (or immersion blender if you don’t like lumps).  Add reserved cooking water as needed to attain desired consistency (if making ahead and baking later, add a little extra liquid so the potatoes don't dry out in the oven). Season with salt and pepper to taste (you may not need any salt, the bouillon water is already salty).

You can stop right here and enjoy or if baking:
4.      Preheat oven to 350˚ F.  Transfer the mashed potatoes to a 9" x 13" glass baking dish.  Bake covered with foil for 25 minutes, then remove foil and bake for another 20 minutes or until lightly browned and warmed through.  
 
If making ahead: Transfer potatoes to baking dish; cool completely. Cover with foil and refrigerate for up to two days.When ready to bake, remove from the refrigerator and bring to room temperature before following baking instructions in Step 4.
potatoes boiling
potatoes draining
I don't like many low-fat or reduced-fat products, but neufchatel is an
exception. I think it tastes great, so I don't use regular cream cheese.
mashing (I don't mind a few lumps, so I don't
bother breaking out the immersion blender)
I like "Better Than Bouillon".  I used to think
that was a horrible name, but really, it says it all.

Monday, January 24, 2011

Slow Cooker Beef Stew

Chuck thinks this stew tastes like cheeseburger (there's no cheese in it). He even refers to it as cheeseburger beef stew (personally I don't see it).  No matter, the important thing is we both like it. I especially like being done making dinner before I've even had my breakfast. That's the beauty of the slow cooker. Then after a hard day's work, voilà! Like magic, dinner is served.
SLOW COOKER BEEF STEW
Yield: 8 servings

1/2 cup unbleached all-purpose flour
1/2 teaspoon salt
1/4 teaspoon black pepper
2 tablespoons extra virgin olive oil
3 lb. beef stew meat, cubed in 1-2 inch chunks
1 large onion, chopped
4 carrots, sliced (or about 25 baby carrots, cut in half)
3 large potatoes, diced
2 celery stalks, sliced
12 oz. beer (not dark)
1/2 cup ketchup
1 (16 oz.) can whole-berry cranberry sauce

Procedure
1.     Combine flour, salt and pepper in a gallon-size ziploc bag.  Shake beef in bag to coat.
2.     In a large soup pot, heat olive oil over high heat.  Sear beef until browned.  Transfer meat to the slow cooker.  Put the lid on to keep the meat warm, but don’t turn the cooker on just yet.
3.     Add sliced onion to the pan and sauté until soft and brown, stirring and scraping bottom of pot frequently, about 8 minutes.
4.      Add carrots, potatoes and celery to the onions; cook for 5 more minutes.
5.      Add beer, ketchup and cranberry sauce to the vegetables. Stir well and bring to a boil.
6.      Pour the vegetable mixture into the slow cooker and stir with beef to combine. 
7.     Cook on high for 1 hour, then reduce to low and cook for another 7 hours (or until the vegetables are tender and the meat is fully cooked).  If you're going out right away, just set it on low for 8 1/2-9 hours.

adapted from Jan Okun, Encino, CA

Beef stew is not the most photogenic dish, so here's my slow cooker.
I don't know much about slow cookers (this is the only one I've ever had).
It's very simple, but gets the job done. They do make ones with more bells and
whistles if you want one you can program to take slow cooking to the next level.

Saturday, January 22, 2011

Cinnamon Swirl Marshmallows

I started making homemade marshmallows because my daughter used to be allergic to corn, which was a huge drag because it's in practically everything in one form or another (really, you'd be amazed). I've always felt bad (and sometimes relieved) that her food allergies prevent her from eating all the things the other kids can, so I just wanted her to experience the unique taste and feel of a marshmallow.

Of course making marshmallows is not a totally selfless endeavor. There is the fun factor. I associate marshmallows with good times. Running around my backyard during a cookout, searching for the perfect marshmallow roasting stick. Fixing s'mores around the campfire (okay, you got me, I've never actually done that, but I hear good things). Not to mention all those warm memories of mini marshmallows bobbing around and getting all melty in my hot cocoa.  Ahh.

 Since I have made plain marshmallows before, I thought it would be fun to experiment with a new flavor. So I combed through my extracts and decided on cinnamon (it was a close call, almond stood a sporting chance). The swirl was added more for decoration than flavor (although it does add a hint of chocolate that goes nicely with the cinnamon).
CINNAMON SWIRL MARSHMALLOWS
Yield: approx. 1 ½ lb.

3 packages unflavored gelatin
½ cup ice cold water

½ cup water
12 oz. sugar (approx. 1 ½ cups)
1 cup Lyle’s Golden Syrup* (or light corn syrup)
1/4 teaspoon kosher salt
1 teaspoon pure cinnamon extract (scant, not heaping)
½ cup confectioners' sugar
½ cup corn starch or potato starch
½ cup bittersweet or semisweet chocolate chips, melted 

*can be found in the baking or International (English) aisle of most supermarkets


1.      Place the gelatin into the bowl of a stand mixer along with 1/2 cup ice cold water. Have the whisk attachment standing by.

2.      In a small saucepan combine 1/2 cup water, sugar, Lyle’s Golden Syrup and salt. Place over medium-high heat and cook until candy thermometer reaches 240º F., about 12-15 minutes. Once the mixture reaches this temperature, immediately remove from the heat. 

3.      Turn mixer on low speed and, while running, slowly pour the sugar syrup down the side of the bowl into the gelatin mixture. Once you have added all the syrup, increase speed to high. Continue to whip until the mixture becomes very thick and is lukewarm, approx. 12-15 minutes.  Add the cinnamon extract during the last minute of whipping. While the mixture is whipping, prepare the pan (see step 4).

4.      Combine confectioners' sugar and corn starch in a small bowl. Lightly spray a 13 x 9-inch metal baking pan with nonstick cooking spray (or lightly grease with canola oil). Add some of the sugar/starch mixture and move around to completely coat the bottom and sides of the pan (be liberal, better too much, than not enough).  Return any remaining mixture to the bowl for later use. 

5.      When ready, pour the mixture into the prepared pan, using a lightly oiled spatula for spreading evenly. Working quickly, drizzle the melted chocolate on top and swirl using a skewer.

6.      Dust the top with enough of the remaining sugar/starch mixture to lightly cover. Reserve the rest for later. Allow the marshmallows to sit uncovered for at least 4 hours and up to overnight. 

7.      Turn the marshmallows out onto a cutting board and cut into 1-inch squares using a pizza cutter dusted with the confectioners' sugar mixture. Once cut, lightly dust all sides of each marshmallow with the remaining mixture, using additional if necessary. Store in an airtight container for up to 3 weeks.

To make plain marshmallows: use 1 teaspoon vanilla extract (instead of cinnamon) and omit the chocolate.

adapted from Alton Brown
If your gelatin looks like this after it soaks up the water, don't worry, it should.
Lyle's Golden Syrup is a cane sugar syrup with a slightly buttery/caramel
flavor.
I chose to use this because my friend Elizabeth tried making
marshmallows with brown rice syrup once and told me it didn't work out
so well (and even though my daughter is no longer allergic to corn,
I'm still not crazy about corn syrup).
If you immediately discount making a recipe when you see
the phrase "using your candy thermometer...", I urge you
to give it a try some time. It really isn't a big deal.
almost there
in the pan, drizzled with chocolate
swirled
extreme swirl closeup
Next time I might try swirling the melted chocolate directly into the bowl, before it's
in the pan (to see if I can get nice big swirls throughout the entire marshmallow).

Friday, January 21, 2011

Coconut Shrimp (with Apricot Dipping Sauce)

If you've been waiting for an excuse to break out the fry daddy, you're long wait is over! (Let me just state for the record, I don't have a fry daddy, just a regular old pot and thermometer.)  Not that there's anything wrong with that.

This dish has got it going on...it's crunchy, sweet, spicy and a little tangy (with the dipping sauce). I've made it a few times, so let me assure you, it's party-goer tested and approved. And you don't have to slave over an oily pot while you're guests stare longingly; you can fry them up to an hour ahead and reheat them in a 350° F. oven (although they are best fresh from the pot and your friends would probably enjoy watching them fry).  It also makes a nice appetizer or main course.


COCONUT SHRIMP
Yield: 48

Apricot Dipping Sauce:

1 cup apricot jam (peach or orange marmalade would probably be nice too)
2 teaspoons finely grated fresh ginger
1 tablespoon freshly squeezed lime juice
1 tablespoon rice wine vinegar
1 teaspoon Dijon mustard
2 tablespoons finely chopped scallions
1/4 jalapeno pepper, seeds discarded and minced (or a few dashes of tabasco)
salt (or soy sauce) to taste

Coconut Shrimp:

10 oz. sweetened flaked coconut (4 cups)
1 cup all-purpose flour
3/4 cup beer (not dark)
3/4 teaspoon baking soda
1/2 teaspoon salt
1/8 teaspoon cayenne
1 large egg
6-8 cups coconut oil or canola oil
48 large shrimp (1 1/2 lb.), peeled, tail on (deveined, if desired)


1.     Combine all the dipping sauce ingredients (adjust amounts to taste) and stir well. Cover and refrigerate.
2.      Coarsely chop coconut and transfer to a shallow bowl or pie plate.
3.      Whisk together flour, beer, baking soda, salt, cayenne and egg in a small bowl until smooth.
4.      Heat oil in a 4- to 6-quart deep heavy pot over moderately high heat until it registers 350° F. on thermometer.
5.      While oil is heating, coat the shrimp: Hold 1 shrimp by the tail and dip into batter, letting excess drip off, then dredge in coconut, coating completely and pressing gently to help adhere. Transfer to a plate and coat remaining shrimp in same manner.
6.      Fry shrimp in oil in batches of 8, turning once, until golden on both sides (about 2 minutes per side). Transfer with a slotted spoon to paper towels to drain. Season lightly with salt if desired. Skim any stray coconut from the oil and return oil to 350° F. between batches.


adapted from Gourmet Magazine

my dipping station
climbing towards 350° F.
frying
draining