Tuesday, July 31, 2012

California Grilled Veggie Sandwich

I'm warning you right now that this sandwich is a little hard to eat (or at least hard to eat gracefully). So maybe you shouldn't serve it at a fancy garden party. But if it's just for your friends and family, definitely give this one a try. If you can't be a slob in front of them, eat it alone. Or get yourself some new friends (I was going to add family to that, but that seems a little cold, even for me). 

I was surprised at how much I loved this. The garlic mayo and soft, warm feta is just unbelievably delicious with the lightly charred vegetables. Plus using homemade rosemary focaccia didn't hurt. I've never gotten all that worked up over a grilled vegetable sandwich before, but this one has me wondering when I'm going to make it again.


CALIFORNIA GRILLED VEGGIE SANDWICH
Yield: 4 servings

1/4 cup mayonnaise
3 cloves garlic, minced
1 tablespoon lemon juice
2 tablespoons olive oil
1 cup sliced red bell peppers
1 small zucchini, sliced
1 red onion, sliced
1 small yellow squash, sliced
2 (4- x 6-inch) focaccia bread pieces, split horizontally
1/2 cup crumbled feta cheese


1.      In a bowl, mix the mayonnaise, minced garlic, and lemon juice. Set aside in the refrigerator.
2.      Preheat the grill for high heat.
3.      Brush vegetables with olive oil on each side. Brush grate with oil. Place bell peppers and zucchini closest to the middle of the grill, and set onion and squash pieces around them. Cook for about 3 minutes, turn, and cook for another 3 minutes. The peppers may take a bit longer. Remove from grill, and set aside.
4.      Spread some of the mayonnaise mixture on the cut sides of the bread, and sprinkle each one with feta cheese. Place on the grill cheese side up, and cover with lid for 2 to 3 minutes. This will warm the bread, and slightly melt the cheese. Watch carefully so the bottoms don't burn. Remove from grill, and layer with the vegetables. Enjoy as open faced grilled sandwiches.

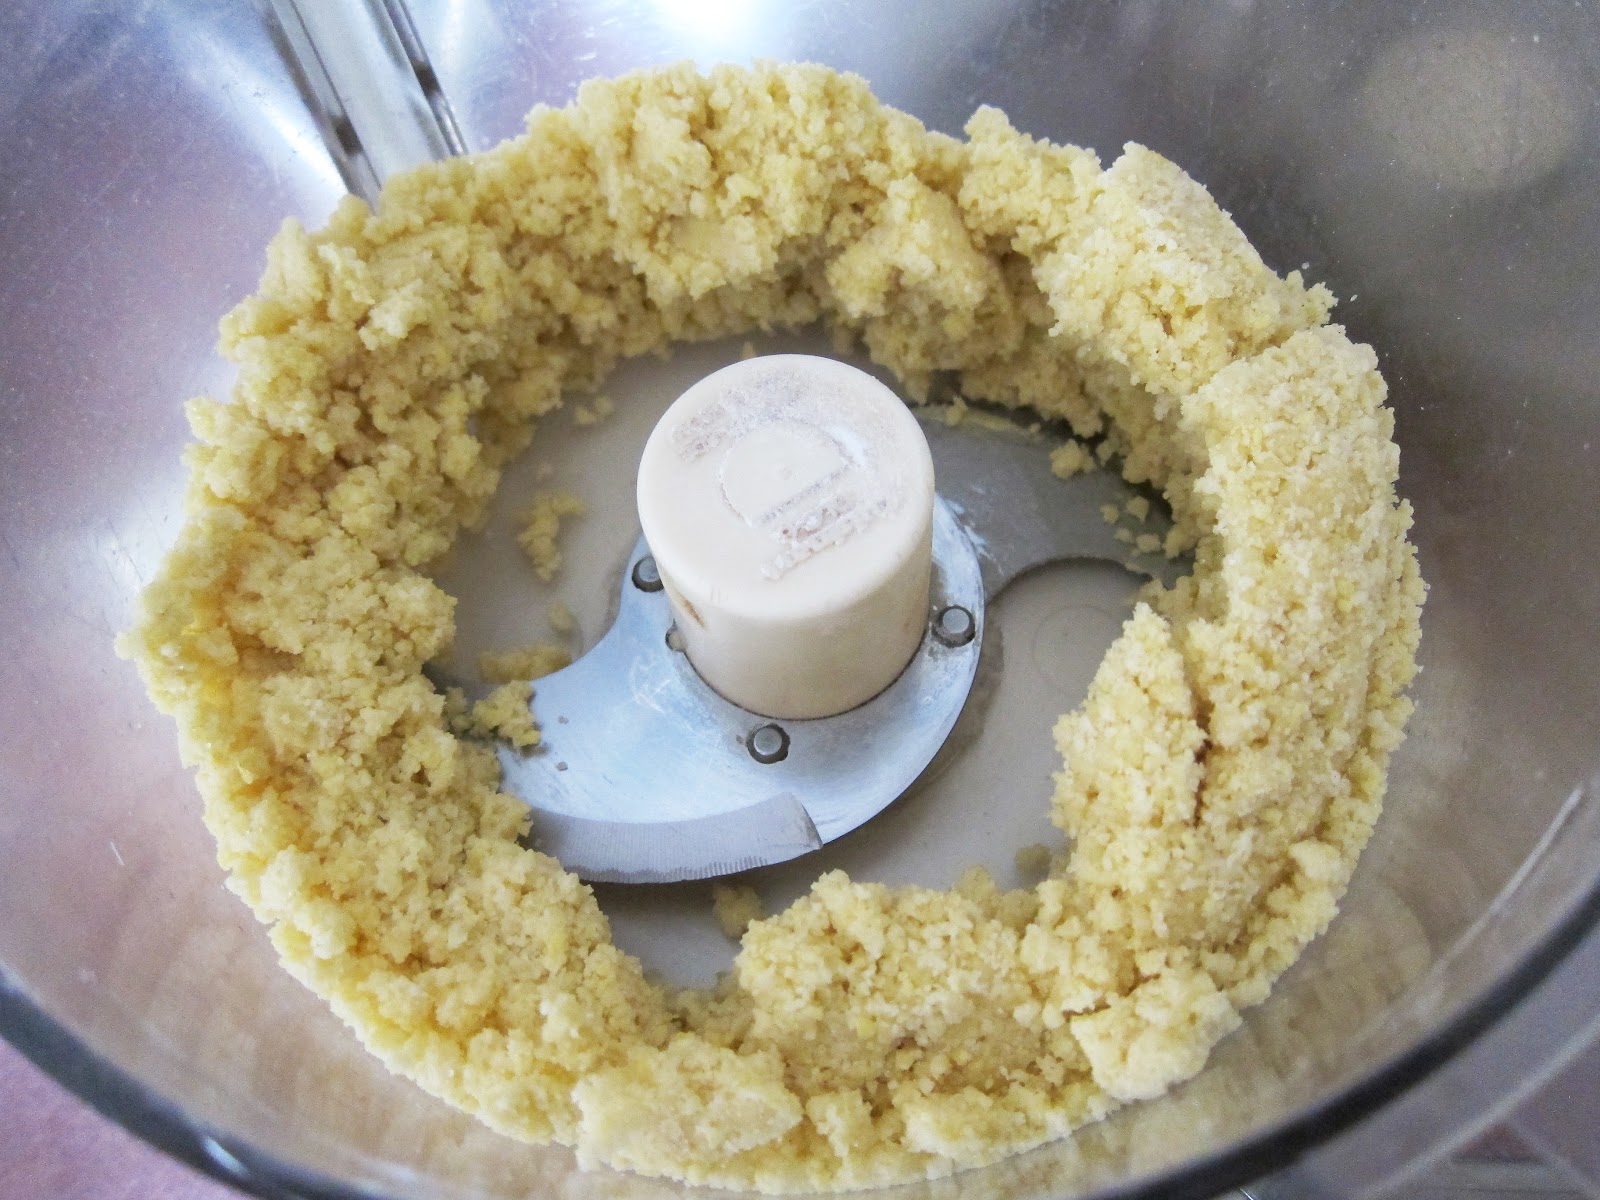
mayonnaise, garlic and lemon
red pepper, zucchini, yellow squash and red onion
veggies on the grill

If you like to grill small stuff, I suggest you get one
of these grill pans (it really cuts down on food loss
between the grill grates and makes it easier to take
things on and off the grill).
getting grilled
homemade rosemary focaccia
focaccia sliced, spread with garlic mayo and sprinkled with feta
focaccia on the grill
grilled focaccia

The feta doesn't look all that melty, but it's
warm and soft (and the bread is toasty).
I bought
a really good quality feta and it was so worth it!
zucchini, yellow squash and red pepper added
topped off with onions

.

Sunday, July 29, 2012

Rosemary Focaccia

I'm no shrink (that's pretty clear just from my use of the word shrink). But I don't think I'm overstating it when I say that the smell of baking bread will cure even the deepest, darkest depression. Okay, that's an obvious lie, but it will probably make you feel comforted and happy (at least for a while). Sure, any bread will do the trick, but this focaccia takes it up a notch. The pungent rosemary-garlic aroma combined with that glorious yeasty, warm bread smell - all I can say is wow. I was counting the seconds before I could remove the focaccia from the oven and get my hands (and taste buds) on it. I know real estate agents like to bake cookies before an open house, but if we ever sell our house, I'm baking this.
 

ROSEMARY FOCACCIA
Yield: 8 to 10 servings

1 ¾ cups warm water
1 package active dry yeast
1 tablespoon sugar
5 cups all-purpose flour, plus additional for kneading
1 tablespoon kosher salt (plus coarse sea salt, for sprinkling)
1 cup extra virgin olive oil, divided
2 garlic cloves, thinly sliced
1 tablespoon finely chopped fresh rosemary


1.      Combine the warm water, yeast and sugar in a small bowl. Put the bowl in a warm, not hot or cool, place until the yeast is bubbling and aromatic, at least 15 minutes.
2.      In the bowl of a mixer fitted with a dough hook, combine the flour, 1 tablespoon of kosher salt, 1/2 cup olive oil and the yeast mixture on low speed. Once the dough has come together, continue to knead for 5 to 6 minutes on a medium speed until it becomes smooth and soft. Give it a sprinkle of flour if the dough is really sticky and tacky.
3.      Transfer the dough to a clean, lightly floured surface, then knead it by hand 1 or 2 times. Again, give it another sprinkle of flour if the dough is really sticky and tacky.
4.      Coat the inside of the mixer bowl lightly with olive oil and return the dough to the bowl. Cover it with plastic wrap and put it in a warm place until the dough has doubled in size, at least 1 hour.
5.      Coat a jelly roll pan with the remaining 1/2 cup olive oil. (Chef's Note: This may seem excessive, but focaccia is an oily crusted bread. This is why it is soooooooooo delicious!).
6.      Put the dough onto the jelly roll pan and begin pressing it out to fit the size of the pan. Turn the dough over to coat the other side with the olive oil. Continue to stretch the dough to fit the pan. As you are doing so, spread your fingers out and make finger holes all the way through the dough. (Chef's Note: Yes, this is strange. But when the dough rises again it will create the characteristic craggy looking focaccia. If you do not make the actual holes in the dough, the finished product will be very smooth.)
7.      Put the dough in the warm place until it has doubled in size, about 1 hour.
8.      Preheat the oven to 425º F.
9.      Heat 1 tablespoon olive oil in a small skillet over medium-low heat. Add garlic; cook 5 minutes or until fragrant.  Remove garlic from oil with a slotted spoon; discard garlic, and remove pan from heat.
10.  Lightly brush the dough with the garlic oil. Sprinkle with rosemary and coarse sea salt. Bake the until the top of the loaf is golden brown, about 25 to 30 minutes. Remove the focaccia from the oven and let it cool before cutting and serving.

slightly adapted from Anne Burrell
adding yeast to warm water and sugar
yeast bubbly
flour, salt, olive oil and yeast mixture
dough coming together
dough smooth and soft
dough after kneading (before rising)
1 hour later (doubled in size, at least)
spreading the dough into the pan and poking holes

I've never seen it done exactly this way before (usually
you just make the dimples by pressing with your fingers
after it's in the pan). But this is Anne Burrell's way and
it works too (it's just a little less uniform).
dough in pan
dough risen (1 hour later)
garlic and rosemary
garlic and olive oil
brushing dough with garlic oil
dough sprinkled with rosemary and salt
baked
rosemary focaccia
  
.

Thursday, July 26, 2012

Maraschino Cherries

Here's the thing about these homemade maraschino cherries...you can feel good about them because they're not neon red (and therefore, not full of whatever unholy chemicals usually make them neon red). And they taste great (adding a little booze never hurts). But they do lose something in the looks department. For starters, I couldn't figure out how to pit them without taking the stems off. Then they got kind of dull and wrinkly after I cooked them. So they're not very sexy poised on top of an ice cream sundae. It was then I realized maybe I shouldn't have bothered making them because honestly, the only reason anyone reaches for a maraschino cherry is to garnish their cocktail and/or sundae (ooh, cocktails and sundaes - now that's a party). But the good news is that these should last a while since their sort of pickled in their cherry liqueur, so I have a little time to figure out what the hell to do with them. Stay tuned.

UPDATE: check out the buttermilk cherry ice cream with cherry sauce I made using these cherries.


MARASCHINO CHERRIES

1 1/4 cups 100% pomegranate juice (I recommend Pom Wonderful brand)
1/4 cup brandy (or another 1/4 cup pomegranate juice)
1 cup sugar
3 ½ oz. fresh lemon juice (from approx. 3 lemons)
pinch of salt
3 whole pieces star anise
8 whole cloves
1 lb. sweet cherries, pitted
1 teaspoon almond extract


1.      In a nonreactive saucepan, add juice, brandy, sugar, lemon juice, salt, cloves and star anise. Place over medium-high heat and bring to a boil. Reduce the heat and simmer the mixture until the sugar has dissolved.
2.      Add the cherries and almond extract. Simmer on low heat for 10 minutes or until the cherries have exuded some of their juice and the syrup has taken on a distinctly cherry flavor. Be careful not to overcook. The point is not to actually cook the cherries, but to heat them in the syrup just long enough to bring out their essence.
3.      Remove the pan from the heat, transfer the cherries and the syrup to a bowl a container with a tight-fitting lid, cover tightly, and refrigerate. The longer the cherries steep, the more flavorful they will become.

slightly adapted from myhawaiinhome.blogpost.com
cherries
pitted cherries

I used my awesome Oxo Good Grips cherry pitter.
lemons
star anise and cloves
pomegranate juice, brandy, lemon juice
and spices coming to a simmer
adding the cherries
cherries and almond extract added
simmered for 10 minutes
maraschino cherries in a jar

I'll bet the cherry liqueur makes a very refreshing
drink mixed with some seltzer. Or a nice cherry
lemonade (obviously when mixed with lemonade).
maraschino cherry on a mini ice cream sundae

See what I mean? No va va voom.
.

Tuesday, July 24, 2012

Tomato Sandwich with Basil Mayonnaise

Sometimes when you have access to incredibly beautiful, fresh produce, it seems like almost a crime not to keep it simple and let its natural flavor shine. A tomato sandwich may not seem terribly exciting, but damn this was good. And the basil mayo is unbelievable! I had extra and figured I would make another sandwich in a day or two, so I sealed it in a small container and tucked it away in the fridge. Less than an hour later I cracked it open, dipped crackers in it and polished it off. Maybe you're not as weak as I am, but I dare you to keep this stuff around for more than a day or two. (If you can resist temptation, you should really consider utilizing your special talent by working in an ice cream parlor or chocolate factory.)


TOMATO SANDWICH WITH BASIL MAYONNAISE
Yield: 3 servings

Basil Mayonnaise:
1 cup good mayonnaise
10 to 15 basil leaves, chopped
1 teaspoon kosher salt, or to taste
1/4 teaspoon freshly ground black pepper
1 teaspoon freshly squeezed lemon juice
1 tablespoon good olive oil
1 teaspoon minced garlic

6 slices country loaf bread
2 to 3 heirloom tomatoes, sliced


1.      Whisk together all the basil mayonnaise ingredients.
2.      Spread basil mayonnaise on each slice of bread. Place sliced tomatoes on top of three of the bread slices. Place remaining bread, mayonnaise side down, on top of the tomatoes. Cut each sandwich in half and serve.

from Ina Garten (quantities tweaked)
gigantic bunch of basil I bought at the farmer's market
basil, lemon and garlic
all the basil mayo ingredients
basil mayonnaise
not heirloom tomatoes

(They didn't have any heirlooms at the farmer's market, but these
were fresh and juicy - everything I could ever want in a tomato.)
basil mayo generously spread on bread

The original recipe had a yield of 1 sandwich for 1 cup of basil
mayonnaise. I changed the yield to 3 sandwiches because even I
couldn't imagine eating an entire cup of mayo on just one
sandwich. Although after you try this mayo, you'll want to try.
tomato slices on top
tomato sandwich with basil mayonnaise
.

Sunday, July 22, 2012

Nectarine Almond Frangipane Tart

I'm just going to state the obvious...I burned the crust. I should have covered the edges with foil during the second half of baking, but I wasn't paying attention and it got away from me. Oh well. I hesitated for just a moment to share this with you, but then I realized how selfish it would be for me to rob you of that comforting feeling you get when you know you're not the only one who does stuff like this. And I already felt bad, so why shouldn't you feel good? You're welcome. Anyway, I guess it's a testimonial to this being a good tart, because in spite of the burnt crust, it was still delightful. And I can tell that the crust is delicious, because the unburnt part on the bottom was awesome (the lemon zest in there is a really nice touch).


NECTARINE ALMOND FRANGIPANE TART
Makes 8 servings

pastry dough:
1 cup all-purpose flour
3 tablespoons sugar
1/2 teaspoon salt
3/4 stick (6 tablespoons) cold unsalted butter, cut into 1/2-inch pieces
1/2 teaspoon finely grated fresh lemon zest
2 large egg yolks
1/2 teaspoon vanilla extract
1 1/2 teaspoons water

frangipane filling:
7 to 8 oz almond paste (not marzipan or almond filling)
1/2 stick (1/4 cup) unsalted butter, softened
3 tablespoons sugar
1/8 teaspoon almond extract
2 large eggs
3 tablespoons all-purpose flour
1/2 teaspoon salt
1 1/4 lb firm-ripe nectarines

glaze:
1/3 cup peach preserves
2 tablespoons water
1 tablespoon Disaronno Amaretto (optional)

Special equipment: 11" x 8" rectangular (or 11" round) fluted tart pan with removable bottom


Make dough:
1.      Put oven rack in middle position and preheat to 375° F.
2.      Pulse flour, sugar, and salt in a food processor until combined. Add butter and zest and pulse until mixture resembles coarse meal with some small (roughly pea-size) butter lumps. Add yolks, vanilla, and water and pulse just until incorporated and dough begins to form large clumps.
3.      Turn dough out onto a work surface and divide into 4 portions. Smear each portion once with heel of your hand in a forward motion to help distribute fat. Gather dough together using scraper and form into a ball, then flatten into a rectangle.
4.      Put dough in tart pan and pat out with well-floured fingers into an even layer over bottom and up sides so it extends about 1/4 inch above rim. Chill 30 minutes.
5.      Lightly prick tart shell all over with a fork, then line with foil and fill with pie weights. Bake shell until golden around edge, about 15 minutes. Carefully remove foil and weights and bake until shell is golden all over, about 15 minutes more. Cool shell completely in pan on a rack. Leave oven on.
Make filling:
6.      Beat together almond paste, butter, sugar, and almond extract in a bowl with an electric mixer at medium-high speed until creamy, about 3 minutes. Reduce speed to low and add eggs, 1 at a time, beating well after each addition, then mix in flour and salt.
7.      Halve nectarines, discarding pits, then cut into 1/4-inch-wide wedges.
8.      Spread frangipane filling evenly in tart shell. Stand nectarine wedges, skin sides down, decoratively in filling, being careful not to push too far into filling.
9.      Bake tart until frangipane is puffed and golden and edges of nectarines are golden brown, about 1 1/4 hours.
Make glaze:
10.  Heat preserves and water in a 1-quart saucepan over moderately high heat, stirring, until preserves are melted. Remove from heat and force through a fine-mesh sieve into a small bowl, discarding solids. Stir in Amaretto (if using).
11.  Brush top of hot tart generously with glaze and cool in pan on rack 15 minutes. Remove side of pan and cool tart completely, about 2 hours.

Gourmet, September 2006
flour, sugar, salt, butter and zest
adding yolks, vanilla and water
dough pulsed
dough in four parts and smeared
dough in pan
I used red lentils as pie weights.
blind baked crust (still looking good)
sugar, butter and almond paste
mixed; adding first egg
eggs already mixed in; adding flour and salt
almond cream
filling the tart crust with almond cream
nectarines
nectarines arranged stupidly

I recommend leaning all your nectarines in one direction,
instead of trying to face them all up. As you can see in the next
photo, they all fell over in different directions and ended up
looking pretty stupid. I guess it just wasn't my day in the kitchen.
baked tart

No, I'm not dyslexic (but if I was smart, I'd go with that).
glaze ingredients (before melting)
glazing tart
nectarine almond frangipane tart
.