Friday, November 26, 2010

Cauliflower-Caramelized Onion Tart

Time for the annual Thanksgiving post show wrap up.  In an effort to keep things a little fresh (while still preserving tradition), I tried out a few new recipes this year and kept some old favorites too.  The tart below was the most well received new recipe.  By the way, if you've never tried roasted cauliflower on its own, make it, it's fantastic!
  CAULIFLOWER AND CARAMELIZED ONION TART
Makes 8-12 servings

1 small head cauliflower (about 1 lb.), cut into 1-inch florets
1 tablespoon olive oil
1 tablespoon truffle oil

1 single recipe pie dough (for 9-inch tart pan)
1 1/2 tablespoons olive oil
1 large onion, halved lengthwise, thinly sliced

1 tablespoon Dijon mustard
2 large eggs
1 (7- to 8-ounce) container mascarpone cheese (Italian cream cheese)
1/2 cup whipping cream
1/4 teaspoon ground white pepper
pinch of ground nutmeg
1 cup grated gruyère cheese
3/4 cup grated parmesan cheese


1.      Position rack in center of oven; preheat to 425° F.
2.      Toss cauliflower with 1 tablespoon olive oil in large bowl. Spread on large rimmed baking sheet, spacing apart. Sprinkle with salt and pepper. Roast 15 minutes; turn florets over. Continue roasting until tender, about 25 minutes longer.
3.      Reduce oven temperature to 350° F.
4.      Cool cauliflower, then thinly slice. Drizzle with truffle oil and toss.
5.      Heat olive oil in heavy large skillet over medium heat. Add onion; sprinkle with salt and pepper. Cook until onion is deep golden brown, stirring occasionally, about 40 minutes. Cool slightly.
6.      Roll pie dough and press onto bottom and up sides of 9-inch tart pan with removable bottom. Line crust with foil; fill with pie weights. Bake for 20 minutes. Remove foil and pie weights; bake until crust is golden, about 5 minutes, pressing crust with back of fork if bubbles form. Cool crust. Maintain oven temperature.
DO AHEAD: Cauliflower, onion and crust can be made 1 day ahead. Store crust at room temperature. Cover and chill cauliflower and onion separately.
7.      Whisk eggs, mascarpone, cream, white pepper and nutmeg in medium bowl. Stir in gruyère.
8.      Brush bottom and sides of crust with mustard. Spread onion in crust. Arrange cauliflower evenly over. Set tart on rimmed baking sheet.  Pour mixture over filling in tart pan; sprinkle with parmesan.
9.      Bake until tart is golden and center is set, about 40 minutes. Transfer to rack; cool 15 minutes before serving.

Bon Appetit, March 2007

Maple Pumpkin Pie

I've made this pumpkin pie for the past 3 Thanksgivings.  I often see other pumpkin pie recipes I'm interested in trying, but I look forward to this one so much that I can't seem to bring myself to expand my horizons just yet.  I guess that's how most ruts start (maybe next year I'll branch out just so I don't fall into one).

MAPLE PUMPKIN PIE

1 single recipe pie dough (for 10-inch pie pan)

1 cup grade B maple syrup (aka extra dark)
2 cups canned solid-pack pumpkin
1 teaspoon ground cinnamon
1 teaspoon ground ginger
1/2 teaspoon salt
1 cup heavy cream
2/3 cup milk
2 large eggs


1.      On a lightly floured surface with a floured rolling pin, roll out dough to 1/8-inch thickness (about a 14-inch round). Fit dough into a 10-inch (1 1/2-quart capacity) pie plate and trim edge, leaving a 1/2-inch overhang. Crimp edge decoratively and chill shell for at least 30 minutes (shell may be made 1 day ahead and chilled, covered loosely with plastic wrap).
2.      Preheat oven to 375° F.
3.      Half blind bake pie shell:  Line crust with parchment or foil and weigh down with pie weights (or beans or rice).  Bake for 10 minutes; remove weights and cook for another 15-20 minutes (or until bottom is dry).
4.      In a 3-quart heavy saucepan, gently boil maple syrup until it reaches about 210° F. on a candy thermometer; cool slightly.
5.      In a bowl whisk together pumpkin, cinnamon, ginger, salt, cream, milk, and eggs.  Whisk in warm maple syrup (quickly so it doesn’t cook the eggs).
6.      Pour filling into shell (brush edge of shell with some egg wash if desired). Bake pie in middle of oven for 1 hour, or until filling is set but center still shakes slightly (filling will continue to set as pie cools). Transfer pie to a rack to cool completely.

adapted from Gourmet, November 1996

cute little dough leaves before baking
cute little dough leaves after baking

I did top my pie with these cute little leaves that I cut from the leftover dough and scored with a knife, but I forgot to take a photo of the finished pie.  I guess I was too busy cursing out the turkey, wondering why it wasn't ready yet (after close to 4 hours in the oven) and trying to figure out which of my three thermometers was accurate...seriously, they each had a completely different reading--what the hell?!

Bourbon Cranberry Sauce

I'm not a big drinker, but I admit that I have a thing for liquor in sweets and my cranberry sauce is no exception.  I think the booze in here makes it quite tasty.  I realized after I made this that I had accidentally used brandy, added it too early (before I baked it) and also forgot to cover it with foil and the cranberry sauce didn't suffer one bit! (No, I wasn't dipping into the brandy.)

 
BOURBON CRANBERRY SAUCE
(Yield:  3 cups)

Ingredients
1 pound (about 4 cups) cranberries
1 3/4 cups sugar
1/4 teaspoon ground cinnamon
1 vanilla bean, scraped (optional)
1/4 cup bourbon

Procedure
Preheat oven to 350° F.
1.      Combine cranberries, sugar, cinnamon & vanilla (if using) in 9x13-inch baking dish. Cover tightly with foil and bake until cranberries are tender and sugar is dissolved, stirring once, about 1 hour.
2.      Remove from oven and stir in bourbon.
3.      Refrigerate cranberry sauce until well chilled.  (Can be prepared 1 week ahead.)

Bon Appétit, November 1991 by Barbara Price, Bloomington, Minnesota

Corn Bread Pudding

I was excited to include corn in our Thanksgiving meal this year (because we recently found out my daughter is no longer allergic).  So I thought I'd try something new.  I was nervous Maddie wouldn't like this because she tends to stick her nose up if she detects onions, but I chopped them so finely that she didn't even notice they were in there!  I thought this was good...I'd make it again.

 
CORN BREAD PUDDING
Makes 8-12 servings

1/2 onion, finely diced
2 tablespoons unsalted butter
1/2 teaspoon finely diced thyme
1/2 teaspoon finely diced rosemary
1 (15 ounce) can creamed style sweet corn
1 (11 ounce) can sweet corn niblets
1 cup heavy cream
2 eggs
1 teaspoon baking powder
1/2 cup yellow cornmeal, whole grain, stone ground
1/2 cup shredded parmesan cheese
¾ teaspoon salt (or to taste)
ground black pepper to taste
2 cups cubed french bread


1.      Sweat onions with butter and herbs until translucent; cool to room temperature.
2.      Preheat oven to 350º F.
3.      Combine corns, cream, eggs, baking powder, cornmeal, parmesan, salt, and pepper in a large mixing bowl. Add onions/herbs and mix.  Add cubed bread and fold to combine.
4.      Spread mixture into a 9” x 13” glass baking dish.  Bake for 45 minutes, or until set. Cool slightly before serving.

adapted from Alton Brown

Green Bean Casserole (sans soup)

If you like green bean casserole, but would rather make it without canned soup, try this recipe.  I'm not judging...if you like using the soup, please continue to do so without feeling any pressure from me to change.  I'm not a snob, I've just been forced to go old school because of my daughter's food allergies.  I can't help it if making mine from scratch makes me better than you.

 I forgot to take a photo of my casserole.  The best I could find was this horrible blown up
one that could be anything really (rice, stuffing, quinoa, booger fricassee).  Sorry about that.

Here's a photo of my pretty, colorful gravy boat to make it up to you.


  GREEN BEAN CASSEROLE
(Yield:  6-8 servings)

Ingredients
4-5 cups green beans, ends trimmed
3 tablespoons butter
1/2 cup crushed buttery crackers (like Pepperidge Farm butterflies)
1 tablespoon all-purpose flour
1/4 teaspoon salt
1/4 teaspoon pepper
1 teaspoon dried minced onion
1 teaspoon sugar
1 cup sour cream
¾ cup shredded sharp cheddar cheese

Procedure
Grease an 8” x 8” baking dish (if doubling, use a 9” x13” baking dish).
1.      Steam green beans to desired tenderness.
2.      Preheat oven to 400˚ F.
3.      In a small saucepan, melt 1 tablespoon butter; stir in cracker crumbs and set aside.
4.      Melt remaining 2 tablespoons butter in a large saucepan. Stir in flour, salt, pepper, onion and sugar; heat and stir until bubbly. Reduce heat; add sour cream and cheese and stir until smooth. Cook and stir over low heat for 2 minutes (do not boil).  Fold in the beans.
5.      Spread into prepared baking dish. Sprinkle the top with cracker crumbs.  Bake, uncovered, for 20 minutes or until heated through and golden on top.

adapted from Betty Shaw

Sunday, November 21, 2010

Peppermint Bark

Aptly named because after making a double batch my dogs are barking!  (I couldn’t resist.)  I make these every year around the holidays and I swear if I didn’t, there would be a revolt.  It’s definitely the most requested holiday treat I've ever made.  You can use those round red/white striped candies, but the little kid in me thinks they taste more like Christmas with actual candy canes.
PEPPERMINT BARK
Makes 36 pieces

17 ounces good-quality white chocolate, finely chopped
6 ounces candy canes, coarsely crushed
7 ounces bittersweet or semisweet chocolate, chopped
6 tablespoons whipping cream
3/4 teaspoon peppermint extract


1.      Turn large baking sheet bottom side up.  Cover with parchment paper. Mark with a 12” x 9” rectangle.
2.      Stir white chocolate in metal bowl set over saucepan of barely simmering water (do not allow bottom of bowl to touch water) until chocolate is melted and smooth and candy thermometer registers 110° F. (chocolate will feel warm to touch).  Remove from over water.  Pour 2/3 cup melted white chocolate onto rectangle.  Using icing spatula, spread chocolate to fill rectangle.  Sprinkle with 1/4 cup crushed peppermints.  Chill until set, about 15 minutes.
3.      Stir bittersweet chocolate, cream and peppermint extract in heavy medium saucepan over medium-low heat until just melted and smooth.  Cool to barely lukewarm, about 5 minutes.  Pour bittersweet chocolate mixture in long lines over white chocolate rectangle.  Working quickly, spread bittersweet chocolate in even layer.  Refrigerate until very cold and firm, about 25 minutes.
4.      Rewarm remaining white chocolate in bowl set over barely simmering water to 110° F.  Working quickly, pour remaining white chocolate over firm bittersweet chocolate layer; spread to cover.  Immediately sprinkle with remaining crushed peppermints.  Chill just until firm, about 20 minutes.
5.      Lift parchment with bark onto work surface; trim edges.  Cut bark crosswise into 2-inch-wide strips.  Using metal spatula, slide bark off parchment and onto work surface.  Cut each strip crosswise into 3 sections and each section diagonally into 2 triangles.
6.      Can be made 2 weeks ahead and refrigerated in an airtight container (or frozen for up to 6 weeks).

Bon Appétit, December 1998

first layer of only white chocolate sprinkled with crushed candy canes

second layer of chocolate ganache being added
third layer of white chocolate being added
done (it just needs to be cut into triangles or broken up)
please note: this photo is a double batch.
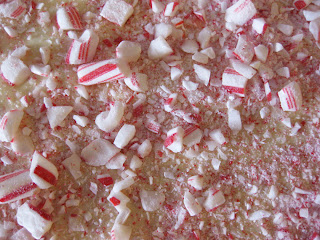
extreme closeup


I like to think they have one of these in the big rock candy mountains

Wednesday, November 17, 2010

Very Green Broccoli Soup

I'm declaring it officially soup season (since I've made two pots in one week)!  To be honest, I didn't have much choice (I couldn't fit all the chicken stock I made this weekend in the freezer).  This recipe is from Michael Chiarello.  I tried it because in addition to the broccoli, it also sneaks in a fair amount of spinach (something neither Chuck nor Maddie is pleased to see on its own).  So big points for being so nutritious (and the pretty green color).

VERY GREEN BROCCOLI SOUP
Makes 4-6 servings

1 1/2 pounds broccoli
2 tablespoons extra-virgin olive oil
1 tablespoon unsalted butter
2 tablespoons minced garlic
1 cup diced onion
1/2 cup diced celery
salt and freshly ground black pepper
2 teaspoons finely chopped fresh thyme leaves
5 cups chicken stock or canned low-salt chicken broth (or vegetable stock)
2 cups packed spinach
2 teaspoons freshly grated lemon zest
1 cup heavy cream or buttermilk (if using buttermilk, cut the lemon zest in half)


1.      Cut the broccoli florets from the stems. Peel the tough outer skin from the stems and trim off the fibrous ends. Cut the stems lengthwise into slices about 1/2-inch thick and then crosswise into 1/2-inch pieces.
2.      Heat the olive oil and butter in a soup pot over medium-high heat until hot. Add the garlic and cook until light brown. Add the onion and celery, lower the heat to medium, and season with salt and pepper. Cook the vegetables slowly until tender, about 10 minutes. Regulate the heat so the vegetables cook without taking on color.
3.      Add the thyme and stir. Add the broccoli stems, stock, and salt and pepper, to taste, and bring to a boil. Cook, uncovered, for about 3 minutes. Add the florets and continue to cook until very tender, about 5 minutes more.
4.      Add the spinach and lemon zest.  Puree the soup using an immersion blender.  (The soup can be made to this point, covered, and refrigerated for up to 1 day or frozen for up to 1 month.)
5.      Return the soup to the pan and reheat over gentle heat. Stir in the cream. Taste and adjust the seasoning with salt and pepper. Keep warm.

Copyright © by Michael Chiarello.  All rights reserved.

Monday, November 15, 2010

Chicken Stock (and Leek Soup)

I woke up a few days ago and realized Thanksgiving is already next week!  I know this is going to sound stupid (because it's been on my calendar all year), but it kind of snuck up on me.  So I decided this was a good time to make some homemade chicken stock to use in a variety of dishes (soup, stuffing, mashed potatoes).

Roughly chopping the vegetables makes it really quick 
(you can even throw in the onion skins and celery leaves)

I was a vegetarian for a long time, so honestly, cooking with meat is still relatively new to me.  So for me, homemade chicken stock was a bit of a revelation.  I made it one day as the base for Matzo Ball Soup and I was hooked. 

So now I save all the chicken bones whenever we eat chicken for dinner (I throw them in a large ziploc bag in my freezer). When the bag gets full, I make stock and freeze it so we always have some on hand. I usually throw in a few actual pieces of chicken with the meat still on too (the stock gets so rich, it actually becomes thick and gelatinous when it cools in the fridge).

I don't follow the recipe below exactly, I just eyeball the amounts (I usually make a giant pot which probably yields more like 24 cups).  But this recipe is a good basic guide.  The only difficult part of making chicken stock is straining it.  Do yourself a favor and get a large, very fine sieve if you make it regularly (you can also use cheesecloth, but it's a bit of a hassle).

Last night I also made a nice Leek Soup with some of the freshly made stock, so I'm including that recipe down below too.  If you make it, don't forget to discard the bay leaf before blending the soup...I did that once and then I got panicky after reading all kinds of internet rumors about eating bay leaves (everything from them being poisonous to cutting up your insides like tiny shards of glass).  Side note: we did eat it anyway and nothing bad happened, but you better believe that I pureed the hell out of that soup first.


CHICKEN STOCK
Makes about 10 cups

1 (3 1/2- to 4 1/2-lb) whole chicken, cut into 8 pieces
2 celery ribs, cut into 2-inch lengths
2 carrots, quartered
2 medium onions, left unpeeled, trimmed and halved
6 fresh parsley stems (with or without leaves)
1 Turkish or 1/2 California bay leaf
8 black peppercorns
4 qt cold water
1 1/2 teaspoons salt (or to taste)
 ___________________________________________________________________________

1.      Bring all ingredients to a boil in an 8- to 10-quart heavy pot. Skim froth. Reduce heat and gently simmer, uncovered, skimming froth occasionally, 3 hours.
2.      Pour stock through a fine-mesh sieve into a large bowl and discard solids. If using stock right away, skim off and discard any fat. If not, cool stock completely, uncovered, before skimming fat, then chill, covered.

Gourmet, September 2003

CREAMY LEEK SOUP
Makes 8-10 servings
leeks etc., simmering away
Ingredients
8 medium leeks (about 3 lb.), chopped & cleaned (white & pale green parts only)
1 medium onion, chopped
1 large carrot, chopped
2 celery ribs, chopped
1 teaspoon salt
1/2 teaspoon black pepper
1 stick unsalted butter
1 small potato (about 6 oz.)
1/2 cup dry white wine
6 cups chicken stock or 48 oz. reduced-sodium chicken broth (or vegetable stock)
1 Turkish bay leaf (or 1/2 California bay leaf)
1 1/2 cups fresh flat-leaf parsley leaves
1/4 cup all-purpose flour
1/2 cup heavy cream
___________________________________________________________________________

1.      Wash sliced leeks in a large bowl of cold water, agitating them, then lift out and drain well in a colander.
2.      Cook leeks, onion, carrot, celery, salt, and pepper in 4 tablespoons butter in a 5- to 6-quart heavy pot over moderate heat, stirring occasionally, until softened, about 8 minutes. Peel potato and cut into 1/2-inch cubes, then add to onion mixture along with wine, stock, and bay leaf. Bring to a boil, then reduce heat and simmer, partially covered, until vegetables are tender, about 15 minutes
3.      Stir in parsley and simmer soup, uncovered, 5 minutes. Discard bay leaf and keep soup at a bare simmer.
4.      Melt remaining 4 tablespoons butter in a 1-quart heavy saucepan over moderate heat, then add flour and cook roux, whisking, until golden, about 3 minutes. Remove from heat and add 2 cups simmering stock (from soup), whisking vigorously (mixture will be thick), then whisk mixture into remaining soup and return to a simmer, whisking.
5.      Blend soup using an immersion blender (or in batches in a blender) until smooth.  Season with salt and pepper.

Note:  Soup is best when made 1 to 3 days ahead (to allow flavors to develop).  Chill soup, uncovered, until completely cooled, then cover.  Reheat, thinning with water if necessary. 

Adapted from Gourmet Magazine, May 2007
blending the soup with the immersion blender (aka "the thunderstick" at our house)
preparing to freeze containers of leek soup and chicken stock

Saturday, November 13, 2010

Rugelach Soldiers

Chuck observed these look like rugelach soldiers 
(and I've been humming it to the tune of Buffalo Soldier ever since).

 FYI: that little string on the left is melted sugar (not a hair)

If you ask me, what makes rugelach so special is the cream cheese dough. I've had rugelach made without the cream cheese and I always think to myself that's not rugelach!  These freeze well after baking (in case you're wondering why I'm making them in November).  Although rugelach isn't just for Hanukkah (or the Jews) anymore!  (I can say that, I'm Jewish.)

RUGELACH
(Yield:  4 dozen)

Dough:
8 oz. cream cheese, slightly softened
1 cup unsalted butter, slightly softened
1/4 cup sugar
1 teaspoon pure vanilla extract
2 cups unbleached all-purpose flour
1/4 teaspoon salt

Filling:
1/4 cup + 2 tablespoons sugar
1/4 cup (firmly packed) light brown sugar (or maple crystals)
1/2 teaspoon ground cinnamon
scant 3/4 cup currants (or 3/4 cup golden raisins)
1 cup finely chopped walnuts
1/2 cup apricot preserves (well stirred)


1.      Dough:  Place cream cheese in food processor. Cut the butter into a few pieces and add it with the motor running. Process until smooth and creamy. Add the sugar and vanilla and process until incorporated, scraping the sides of the bowl. Add flour and salt and pulse just until the dough starts to clump together.  Scrape dough onto plastic wrap and press together to form a ball. Divide into 4 portions and make shape each one into a disk.  Cover each disk with plastic wrap. Refrigerate 2 hours or overnight.
2.      Filling:  In a medium bowl, combine sugars, cinnamon, currants, and walnuts and stir until well mixed.
3.      Before rolling out the dough, remove from the refrigerator and allow it to sit on the counter for about 10 minutes or until it is malleable enough to roll. 
4.      Preheat oven to 350° F.  Line 2 baking sheets with parchment paper.
5.      Using a floured rolling pin and board, roll out each disk of dough, one at a time, into a 9-inch circle (1/8-inch thick), rotating the dough often to be sure it isn't sticking.  (Keep dough circles flat in the refrigerator while you roll out the other disks.)
6.      Using the back of a tablespoon, spread the first dough circle evenly with 2 tablespoons apricot preserves. Sprinkle 1/2 cup of the filling over the preserves. Press the filling firmly and evenly to help it stick.  Using a sharp knife or pizza cutter, cut the dough circle into 12 triangles (like a pizza).
7.      Starting at the wide end, roll up each triangle one by one and bend the ends around to form a slight crescent shape. Place the rugelach, point underneath, about 1-inch apart on prepared baking sheets. Refrigerate for at least 30 minutes or until firm.
8.      Repeat (clean the excess filling off your work surface before each batch).
9.      Bake for 20-22 minutes or until lightly browned.  For even baking, rotate baking sheets from top to bottom & front to back halfway through baking. Using a silicone spatula, carefully remove rugelach while still hot (so the melted sugar gets left behind).  Let cool.
10.  Store in an airtight container at room temperature (5 days) or in the freezer (3 months).
A 9" cake circle works nicely


I use a pizza cutter


I like Polaner All Fruit

                 before baking

Sorry about the scattered photos...I played around with these for at least 40 minutes, but still couldn't get them to line up in order!  But you get the idea.

It's normal for some filling to ooze out during baking.  The melted sugar looks messy at first, but if you (carefully) remove the rugelach from the sheetpan while still hot (before the sugar cools and hardens), the rugelach come out clean.  If you get distracted and the sugar does harden, you can just break it off around the edges (but it's much quicker and easier to remove them while still warm).


Sunday, November 7, 2010

Bacon & Cashew Caramel Corn (2010's best party food)

This recipe was the most popular party food I made in 2010.  I realize the year isn't over yet, but that's how confidant I am that this will remain the runaway front-runner.  I brought this to several parties and watched the everyone's eyes light up (adults and small children alike).  It may sound strange to you, but trust me on this one (have I ever steered you wrong)?

Be sure to have everything else prepped before your caramel syrup is ready to pour...last time I made this I forgot to toss my bacon and cashews in first and in a mad dash to get them in before my caramel syrup starting seizing up, I burned my hand (nothing serious, but it did hurt).  I'd do it again though (that's how tasty this stuff is).

BACON & CASHEW CARAMEL CORN 
Makes about 20 cups

3/4 cup popcorn kernels
3 tablespoons coconut oil (can substitute vegetable or canola oil)
16 oz. bacon (cooked until almost crisp, drained, cooled and chopped)
2 cups unsalted raw cashews
3 cups sugar
1/2 cup water
1/4 cup brown rice syrup (can substitute light corn syrup)
1/2 cup heavy cream
2 oolong tea bags
1 teaspoon coarse kosher salt or coarse sea salt
pinch of cayenne pepper 
_____________________________________________________________________________________________________________________________
1.      Heat popcorn and oil in covered heavy, large pot over medium-high heat until kernels begin to pop. Shake pot until popping stops. (Or you can use a hot-air popper and skip the oil.)  Pour popcorn into a gigantic bowl (the largest one you can find). 
2.      Add bacon and cashews to bowl with popcorn and toss. 
3.      Preheat oven to 300° F. (or 290º F. for convection setting).  Line two rimmed baking sheets with parchment paper. Coat 2 heat resistant spatulas with oil; set aside. 
4.      Stir sugar, water, and brown rice syrup in large saucepan over medium-low heat until sugar dissolves. Increase heat to high; boil without stirring until syrup turns deep amber, occasionally swirling pan and brushing down sides with wet pastry brush, about 20-25 minutes. 
5.      While caramel syrup cooks, bring cream and tea bags just to boil over medium heat. Remove from heat; let steep 15 minutes, occasionally pressing on tea bags with back of spoon to release flavor.  Discard tea bags. 
6.      When caramel syrup is ready, remove from heat.  Immediately add salt, cayenne and cream; quickly stir until blended (mixture will bubble up).  Immediately drizzle caramel over popcorn mixture; toss with oiled spatulas until evenly coated. Transfer to baking sheets. 

7.      Place caramel corn in oven; bake until caramel is shiny and coats popcorn, tossing mixture occasionally, about 30-40 minutes. Cool completely, tossing occasionally to break up large clumps.

DO AHEAD: Can be made 2 days ahead. Store airtight in refrigerator.

adapted from recipe by Colt and Gray restaurant in Denver, CO (published in Bon Appetit)

Tip for the peanut-challenged:  I order my cashews from tierrafarm.com...all their nuts and seeds are processed in a peanut-free facility (very exciting when someone you love is allergic to peanuts, but not tree nuts)!

Saturday, November 6, 2010

Sundried Tomato & Pesto Torta (the "it" party food of 2009)

This was the hands-down most requested recipe I made in 2009.  I brought it to several parties and everyone ooh'd and ahh'd.  It's especially nice for Christmas because of the red, green and white colors.  I like to cut it in quarters or in half (once partially frozen) because it's too big for most gatherings, plus it looks pretty as a half-circle laid flat side down.
Sun-Dried Tomato and Pesto Torta
 

SUNDRIED TOMATO AND PESTO TORTA
Makes 20 servings (probably more)

4 garlic cloves
1 1/2 cups (packed) fresh basil leaves, plus a few sprigs for garnish
1/4 cup pine nuts, plus more toasted pine nuts for garnish
2 tablespoons extra virgin olive oil
1 teaspoon fresh lemon juice
1/4 cup freshly grated parmesan cheese
1 2/3 cups cream cheese (about 13 ounces), room temperature
1 1/3 cups drained oil-packed sundried tomatoes
1/3 cup tomato paste
1 cup (8 oz.) plain, soft goat cheese, room temperature
1/2 cup (1 stick) butter, room temperature
salt and black pepper

1-2 baguettes, sliced and toasted (or “petit toast” crackers)


1.      Finely chop garlic in processor. Add basil, pine nuts, oil and lemon juice. Process until well blended. Add the parmesan and 1/3 cup of the cream cheese. Using on/off turns, process just until blended. Transfer pesto to medium bowl.
2.      Coarsely chop tomatoes in processor. Add tomato paste and process until mixture is almost smooth. Add 1/3 cup of the cream cheese and blend well.
3.      Using electric mixer, beat goat cheese, butter and remaining cream cheese (1 cup) until fluffy.  Season with salt and pepper.
4.      Lightly oil a 6-cup soufflé dish; line with plastic wrap, extending plastic over sides (or use a
6 ½” non-stick spring form pan—line bottom with parchment if desired).
5.      Spread 1/2 cup cheese-butter mixture evenly over bottom of prepared dish.  Top with half the tomato mixture, then 1/2 cup cheese-butter mixture, then half the pesto mixture. Repeat layering with 1/2 cup cheese-butter mixture, remaining tomato mixture, 1/2 cup cheese-butter mixture and remaining pesto.  Top with remaining cheese-butter mixture. Cover and chill overnight. (Can be made 3 days ahead. Keep refrigerated.)   Freezes well (thaw in refrigerator for at least 24 hours before serving).
6.      If using soufflé dish, invert torta onto platter and peel off plastic (if using spring form pan, just remove side of pan). Garnish with basil sprigs and toasted pine nuts. Serve with toasted baguette slices.

Tip:  Freezing for 10-15 minutes between layers makes it easier to spread.

Note:  This version is slightly different from the original (it substitutes some goat cheese for cream cheese, uses less butter and has a few tips thrown in).  The original recipe can be found on epicurious.com. Copyright © Bon Appétit, December 1999