Showing posts with label Halloween. Show all posts

Thursday, October 31, 2013

Brownie Spiders

Happy Halloween! I saw these cuties online and knew they'd be perfect for my daughter's school party today. I hoped to finish them yesterday and post them before Halloween, but clearly that was not meant to be. But the important thing is that I finished them before the party, with time to dry (I wouldn't want the eyeballs to fall off). Although if that happens this afternoon, I'll just claim it was on purpose (me trying to make the spiders scarier). It's all about spin. 

BROWNIE SPIDERS
Yield: approx. 20 spiders

1 (9” x 13”) pan baked brownies
1/2 cup semisweet or bittersweet chocolate chips
2 cups chow mein noodles
candy eye balls (at least 40)
_____________________________________________________________________

1.      Use a 1 ½- to 1 ¾-inch circle cookie cutter to cut out circles for the spider "bodies".
Place on wax paper for prep, or place them right on your serving tray.
2.      In a double-boiler, melt the chocolate chips in a medium-sized bowl. Remove 2 tablespoons of the melted chocolate and set aside.
3.      Place a sheet of waxed paper on a sheet pan or large plate. Gently stir the chow mein noodles into the remaining melted chocolate until all of the noodles are coated. Spread the noodles out on the wax paper, separating them as much as possible, and then pop them in the freezer for about 10 minutes to chill and re-harden the chocolate. Once chilled, remove the chocolate covered noodles, and pick out some long ones to use as the spider "legs".
4.      Using the melted chocolate that you set aside and a toothpick, transfer a dot of melted chocolate to the back of each candy eye as the "glue". Place the eyes on the front of the brownie circles.
5.      Dip the tip of each “leg” in melted chocolate and insert 4 legs into each side of each spider body.
6.      Set aside for chocolate “glue” to set (will keep for up to 4 days).

barely adapted from gimmesomeoven.com
adding chow mein noodles to melted chocolate
the original instructions said not to worry about
separating the "legs" completely, but mine really
stuck together, so I recommend separating.
cutting brownie circles
brownie spiders
The original "recipe" has the legs inserted on the top/sides. But I played around and thought they looked better on the sides. Obviously you should go with whatever you like best.
.

Friday, October 26, 2012

Pumpkin Seed Brittle

This is a fantastic treat for Halloween. I wish I could say that it was a great way to use up all those seeds you scooped out of your pumpkin when you were making your jack-o-lantern, but I can't. Because unless you're willing to hull all your seeds by hand, you need to buy them already hulled. So go ahead and toast your pumpkin seeds and eat those as a snack while you make a batch of this addictive confection. Move over peanuts.

PUMPKIN SEED BRITTLE
Makes 12 servings (as part of tapas buffet)

1 cup sugar
1/2 cup water
1/8 teaspoon fine sea salt
3/4 cup (4 oz.) green, hulled pumpkin seeds (also known as pepitas), raw—not toasted
______________________________________________________________________

1.      Put a 24- by 12-inch sheet of parchment on a work surface and anchor corners with pieces of tape. Or you can use a silpat if breaking the brittle instead of cutting (omit the tape). Have a second sheet of parchment ready.
2.      Bring sugar, water, and sea salt to a boil in a 2-quart heavy saucepan over moderate heat, stirring until sugar is dissolved. Cook mixture, without stirring, washing down any sugar crystals from side of pan with a pastry brush dipped in cold water, until syrup registers 238° F. (soft-ball stage) on thermometer, 10 to 12 minutes (sugar syrup will be colorless).
3.      Remove sugar syrup from heat and stir in seeds with a wooden or silicone spoon, then continue stirring until syrup crystallizes, 3 to 4 minutes.
4.      Return pan to moderate heat and cook, stirring constantly, until sugar melts completely, (sugar will continue to dry and become grainy before melting) and turns a deep caramel color, about 15 minutes or more (seeds will be toasted).
5.      Carefully pour hot caramel mixture onto parchment and carefully cover with another sheet. Immediately roll out (between sheets of parchment) as thinly as possible with a rolling pin, pressing firmly. Remove top sheet of parchment and immediately cut brittle into pieces with a heavy knife or pizza wheel.
6.      Cool brittle completely, then peel paper from bottom. (Alternately, break brittle into pieces once cool.) Brittle can be made 2 weeks ahead and kept, layers separated by wax paper, in an airtight container.

from Gourmet, January 2005 (procedure slightly tweaked)
hulled pumpkin seeds (also known as pepitas)
sugar, water and salt cooking

My sugar syrup wasn't colorless because I used evaporated
cane sugar (which is browner than regular sugar).
approaching 238° F.
adding the pumpkin seeds
stirring

So far it looks normal, but as you'll see, it
starts to really dry out, the more you heat/stir.
getting bubbly
Okay, now you're starting to wonder
why it's getting thicker and weird.
Now it's so thick you're thinking you've
screwed up and it's not going to work.
Now you're cursing at your pan because
you're convinced after all this stirring that
you'll have nothing to show for it.
And now it looks like sand and you're realizing you can't
even throw this stuff away until it cools off, so you
might as well keep stirring and pray for a miracle.
Hallelujah...it's starting to melt again!
miracles do happen
ready to pour
I used a silpat (silicone mat) because I was
planning on breaking my brittle, not cutting
it (you don't want to slash your silpat).
spread out and ready to roll

FYI: this is a double batch.
rolling out with a piece of parchment on top
cooled and parchment removed
pumpkin seed brittle

.

Tuesday, November 1, 2011

Carrot-Ginger Quinoa Pepperjacks

I was definitely in the Halloween spirit this week, but not feeling terribly original I guess. First I made a snakewich (concept stolen from Better Homes and Gardens) and now I've gone and robbed pepperjacks from a blogger named spabettie. But can you blame me? Really, they're just so cute. I couldn't help myself. And the quinoa cooked in the carrot-ginger juice tastes really fresh and delicious. Plus it's good for you (that was just a happy accident).


CARROT-GINGER QUINOA PEPPER JACKS
Yield: 2

1/2 cup dry black quinoa
1 cup carrot-ginger juice (5 carrots + 1-inch piece ginger, juiced)
1 cup cooked black beans
2 orange bell peppers
sea salt
spinach salad for serving (optional)


1.      Combine quinoa and carrot-ginger juice in a medium saucepan; bring to a boil. Reduce to a simmer, cover and cook for 20 minutes.
2.      Preheat oven to 350º F.
3.      Hollow out and carve the peppers to resemble jack-o-lanterns.
4.      Combine cooked quinoa with black beans and salt to taste.
5.      Fill peppers and bake for 30 minutes.
6.      Serve over spinach salad if desired.

carrots and ginger
juicing carrots and ginger

If you don't have a juicer, see if you can find carrot or
carrot-ginger juice in the refrigerated section at your
store. If you can find plain carrot juice, you can always
grate some ginger and squeeze the juice in yourself.
carrot-ginger juice
black quinoa

I think this would also taste/look good with black forbidden rice.
quinoa and carrot-ginger juice in pan
cooked quinoa with black beans mixed in
cutting my pepper jack

I went a little overboard with my cutouts.
They should be much more dainty, especially the
mouth (unless you're actually trying to make it look
like your pepper jack is throwing up quinoa).
filling a pepper
filled pepper jacks, before baking
baked

See what I mean, the one on the left looks like
he just ate expired clams from a gas station.
.

Sunday, October 30, 2011

Turkey Meatball Slithering Snakewich


I wish I could take credit for dreaming up the slithering snakewich, but that esteemed honor goes to Better Homes and Gardens. Only theirs was made with pepperoni and some other stuff that didn't really interest me. So I turned mine into a turkey meatball sub. Obviously, you can fill yours with anything you want. Except for head cheese - that's just nasty and wrong. In fact, I forbid it (by the power vested in me by the state of good taste).


TURKEY MEATBALL SLITHERING SNAKEWICH
Makes: 6-8 servings

1 lb. baguette dough (or 1 16-oz. loaf frozen bread dough, thawed)
5 turkey meatballs (see recipe below)
1/2 cup homemade tomato sauce
4 oz. grated or sliced mozzarella cheese
1 strip roasted red pepper
2 pimiento-stuffed olives
________________________________________________________________________

1.      Roll the bread dough into a 22-inch long rope. Place on a large greased baking sheet and form into a "snaky S" shape. Let rise and bake according to the recipe (or package directions). Cool to room temperature. 

2.      Preheat oven to 350º F.

3.      Hollow out the center portion of the loaf about 1-inch deep and 1 ½-inches wide, leaving about 2-inches on each end of the loaf. 

4.      Stuff bread with meatballs, cutting if necessary to fit. Top with sauce and cheese.

5.      Place on a greased or foil lined baking sheet and bake until heated through and cheese is melted, about 10-15 minutes.

6.      Cut the red pepper strip into a “V” shape at one end (to resemble a snake’s tongue). Make a slit in the front of the loaf (for the mouth) and insert the tongue. Insert 2 toothpicks above the mouth, where the eyes should be. Place olives on the toothpicks for the eyes.

concept robbed from Better Homes and Gardens
dough shaped like a snake

1 lb. of dough is 1/4 of the almost no-knead baguette recipe.
dough baked
dough hollowed in the middle (I probably should
have hollowed it more so I could fit more meatballs).
I cut the meatballs to fit.
stuffed with meatballs

It's a little light on the meatballs, but you can
always serve more on the side (I mean really, if
you're making a snakewich, it's mostly for show).
sauce on top
sprinkled with grated cheese
cheese melted

I did realize it could use more cheese, so I added it.
_______________________________ 

TURKEY MEATBALLS
Yield: approx. 12-15

6 cups homemade tomato sauce
1 (20.8 oz.) package ground turkey (93/7)
3 large eggs
1/2 cup 2% milk
2 cloves garlic, minced
1/2 cup Italian style breadcrumbs
1/2 cup grated parmesan cheese
1/2 teaspoon onion powder
1/2 teaspoon garlic powder
1/2 teaspoon dried oregano
1/2 teaspoon dried parsley
1/2 teaspoon dried basil
1/4 teaspoon kosher salt
5 grinds fresh black pepper
olive oil for frying
_________________________________________________________________________

1.      Heat the tomato sauce in a large sauce pot (or slow cooker). Keep at a low simmer while you make the meatballs.

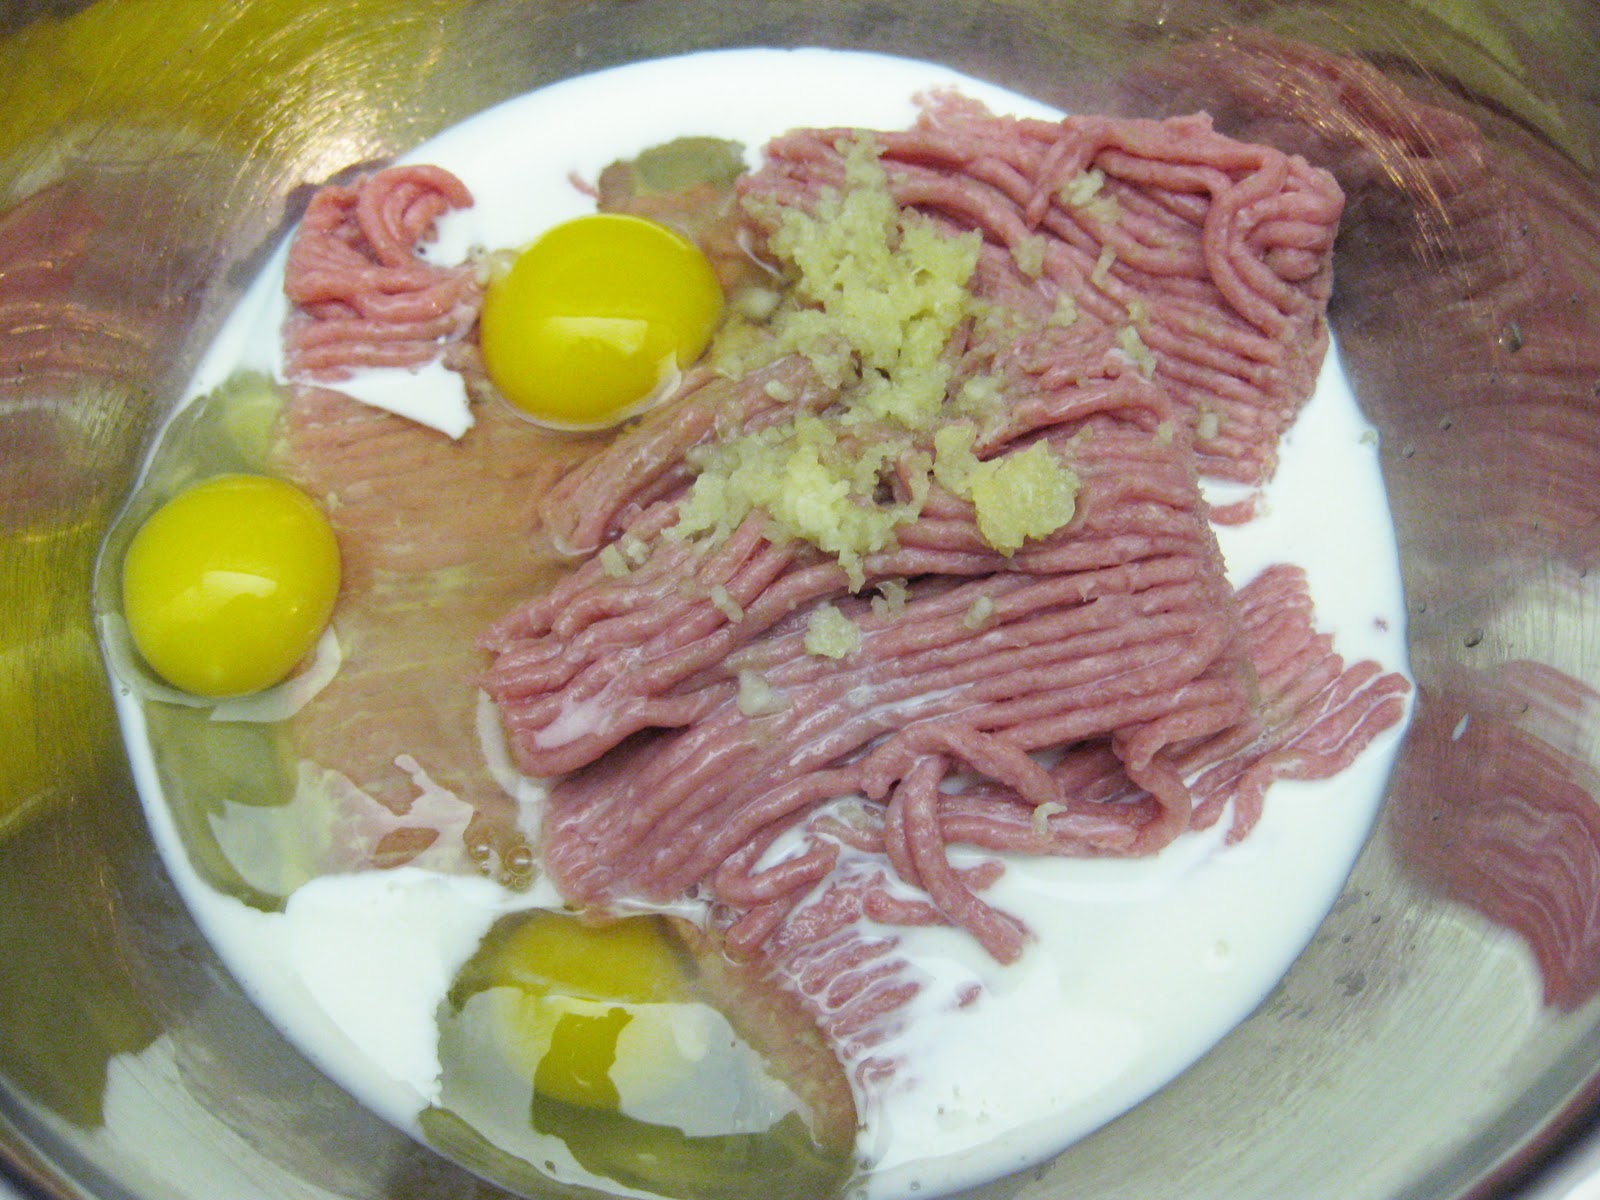
2.      In a large bowl combine the ground turkey, eggs, milk and garlic. Stir until thoroughly combined. Add the remaining ingredients and mix together thoroughly.

3.      Heat about 1/4-inch olive oil in a large frying pan over medium heat. When the oil is hot, start rolling your meatballs (about 2” in diameter) and place them directly into the hot pan. Brown on all sides, then transfer them one at a time (using a slotted spoon) to the hot sauce to finish cooking.

4.      Let the meatballs simmer for 2 hours (or all day in a slow cooker).

from Elizabeth Errico, Foodie, Formerly Fat
turkey, eggs, milk and garlic
adding the breadcrumbs, parmesan and spices
mixed and ready to roll
rolled and in the pan
browning

If you're actually making these into a snakewich,
you don't need to worry about them getting a little
flat (that actually makes it easier to stuff the snake).
adding to the simmering sauce
(I used the sauce from spaghetti & meatballs)
turkey meatball

I had dinner at my friend Elizabeth's house once and she made
these meatballs. I didn't think I would like turkey meatballs (because
I'm not a big turkey fan), but I loved these. Juicy and delicious!
.