Thursday, July 19, 2012

Fig and Blue Cheese Savouries

I wanted to love these unusual little...crackers, I guess I'll call them (cookies doesn't seem quite right). But I didn't. They just tasted kind of off to me. Like when milk is right on the edge and you can't decide whether it's still good or not (by the way, in that situation I advise erring on the side of caution and going with not). What surprised me about these was that while I expected to like them and didn't, my 7-year-old daughter loved them. She asked me to put them in her lunchbox the next day. The girl doesn't like blue cheese or figs and told me how gross it all looked the whole time I was making them, so I certainly didn't see that coming. I think she just likes to see that look of confusion on my face. Well played Maddie.


FIG AND BLUE CHEESE SAVOURIES
Makes about 3 dozen

1 cup all-purpose flour
1/2 cup butter, room temperature
4 ounces blue cheese, crumbled
freshly ground black pepper
approx. 3 tablespoons fig preserves


1.      Heat oven to 350º F. Line a baking sheet with parchment paper.
2.      Place the flour, butter, blue cheese and a few grinds of black pepper in the bowl of a food processor. Process until the dough just comes together and starts to form a ball.
3.      Dump the dough onto a lightly floured surface and knead a few times to pull the dough together. Roll out to 1/8-inch thick with a floured rolling pin. Cut rounds out of the dough with a floured 1-inch cutter and transfer the rounds to the parchment-lined baking sheet.
4.      Using the rounded back of a half-teaspoon measure or your knuckle, make an indention in the top of each dough round. Spoon about ¼ teaspoon of fig preserves into each indention, using your finger to push the preserves as best as possible into the indentions.
5.      Bake the savories for 10 - 14 minutes, until the preserves are bubbling and the pastry is light golden on the bottom.
6.      Let cool on the baking sheet for at least 10 minutes, then remove to a wire rack to cool. Can be made a day ahead (keep them in two layers separated by waxed paper in an airtight container).

from food52.com (submitted by TheRunawaySpoon)
flour, butter, blue cheese & black pepper
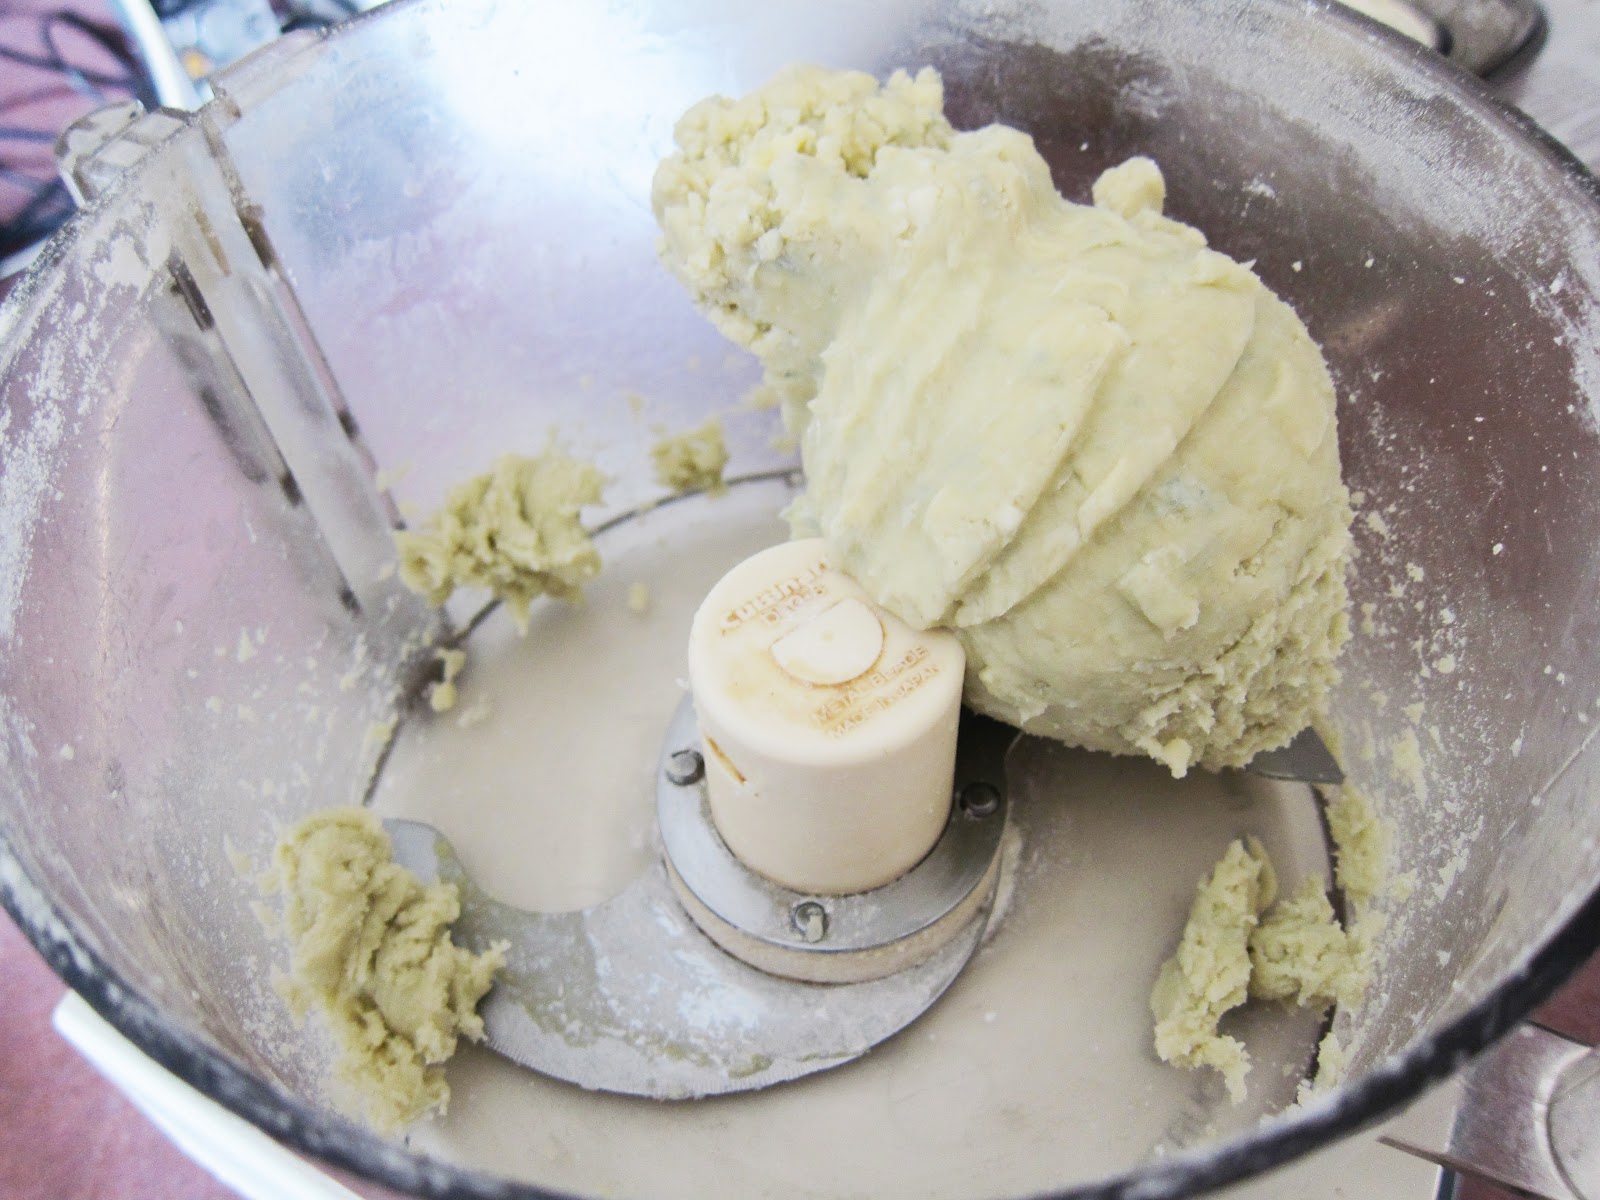
blue cheese dough
dough disk
rolled dough
cutting into rounds
dough rounds
topped with fig jam
fig and blue cheese savouries

.

Tuesday, July 17, 2012

Mum's Red Lentils

This recipe was originally titled Mum's Everyday Red Lentils. No disrespect to Aarti (the chef/author), but I removed the everyday because I thought it made it sound super quick to make. And while it's simple enough, you can't just whip it up in like 10 or 15 minutes. To be fair, maybe Aarti and her Mum can and I'm just slow. But my blog, my call. Now I realize what she probably meant was everyday vs. fancy, but that didn't work for me either, because this is as fancy as I get with my lentils. All that being said, these lentils have great flavor and are totally worth making. Just not every day.


MUM'S RED LENTILS
Yield: 4 servings

Lentils (dal):
1 cup masoor dal red lentils, picked through for stones
2 cups water
1 onion, diced
4 cloves garlic, thinly sliced
1 (1/2-inch) piece ginger, peeled and minced
2 medium tomatoes, diced
1 serrano chile, sliced in half (optional)
salt to taste

Tempering oil (bagaar):
1/2 teaspoon cumin seeds
1/2 teaspoon black mustard seeds
generous 1/2 teaspoon turmeric powder
1/2 teaspoon paprika or bafaat powder
1 tablespoon vegetable oil
handful chopped fresh cilantro leaves


1.      Put the lentils in a strainer and rinse them under running water. Add them to a bowl, cover with water and let soak for 30 minutes. Drain and set aside.
2.      In a medium saucepan, combine the water, onions, garlic, ginger, tomatoes, chile and the lentils (do not add salt yet—it will toughen the lentils, thereby lengthening their cooking time). Bring to a boil over medium-high heat. Skim any scum from the surface. Lower the heat, cover the pot with a lid and gently simmer until the lentils are tender, almost translucent, and almost falling apart, about 30 to 40 minutes.
3.      Whisk the lentils, releasing its natural starch, and mash some them so the mixture becomes thick. Add salt, to taste.
4.      Tempering oil (bagaar): In a small bowl, combine the cumin and mustard seeds. In another bowl, combine the spice powders. Have everything ready because this will move very fast!
5.      In a small skillet, over a medium-high flame, warm the vegetable oil. Once the oil is shimmering, add seeds and immediately cover so you don't get covered in spluttering oil and seeds! Add the spices. They should sizzle and bubble a little - that's the blooming and it's exactly what you want. Don't let them burn. The mixture should bloom for about 30 seconds, no more.
6.      Pour the oil mixture into the lentils, standing back so you don't get hurt when the mixture splutters again. Stir to combine. Transfer the lentils to a serving dish and garnish with cilantro.

from Aarti Sequeira, 2010
knob of fresh ginger
As usual, I couldn't find a serrano, so I used a jalapeño.
already soaked lentils in the pan with the water
onion, garlic, ginger, jalapeño and tomato added
all stirred up
simmering
cooked
whisking (steamy)
adding turmeric and paprika to cumin and black mustard seeds
spices sizzling
stirring in the spices
ready
Mum's red lentils
.

Sunday, July 15, 2012

Japanese Mum's Chicken

Just two days ago I posted another Japanese recipe (okonomiyaki), which inspired me to make this Japanese chicken. Only I don't know if this is really a traditional Japanese way to make chicken or just the way that this particular Japanese Mum makes her chicken (especially since I'm pretty sure Japanese people don't even call their mothers Mum). But it couldn't matter less because all you need to know is that it's ridiculously easy and loaded with great flavor. It will totally satisfy that sweet/salty craving and you will lick every last bit of glaze off your fingers. Side note: I don't recommend serving it with mashed potatoes (like in this photo). I just happened to have some leftover and we weren't having guests or anything. So do me a favor, serve yours with rice and keep that embarrassing tidbit just between you and me.


JAPANESE MUM'S CHICKEN
Servings: 4

8 chicken drumsticks, skin on (the skin is important for flavor)
1 cup water
1/2 cup balsamic vinegar
1/3 cup soy sauce
2 1/2 tablespoons sugar
1 garlic clove, peeled and bruised
1 small hot chili pepper, slit open, seeds removed 


1.      Place all the ingredients in a saucepan over a high heat.
2.      Bring to the boil, then reduce to a simmer for about 20 minutes.
3.      Remove any scum that rises to the surface.
4.      Increase the heat, turning the drumsticks frequently in the liquid, and cook until the liquid has reduced to a sticky glaze.
5.      Arrange the chicken on a serving platter, remove the garlic clove and chili from the liquid, and spoon the glaze over. Note: It's a glaze, not a sauce, so there's not a whole lot of it.
 
from food.com (submitted by JustJanS)
hot chili peppers
Even though the recipe calls for keeping the chili pepper
whole/seeded, I mindlessly chopped mine. No one knows why.
all the ingredients in the pan
boiling
simmering
liquid reduced to a nice glaze
Japanese Mum's chicken
 .