Saturday, April 30, 2011

Jeni's Splendid Ice Creams

It's time again for another "favorite things" post. I think we've all had some pretty incredible ice cream at some point in our lives. Let's face it, even bad ice cream is good. But I'm talking about that extra special one. The one that with the first spoonful, your eyes roll back in your head and you wish that moment would never end.

Up until last year, I thought the best ice cream I'd ever had was gelato on the streets of Rome. I just assumed it would go unrivaled for the rest of my life. Then I tasted one of Jeni's Splendid Ice Creams (pistachio-honey to be exact). Oh. My. God. I was transported (I'm not sure where I went exactly, but it was glorious).

The funny thing is that pistachio has never even been one of my favorites. I've always thought it was okay, but I've never been crazy about the actual pistachio chunks. But Jeni's pistachio-honey is smooth and there is just something divine about the honey and the pistachio together. To say it's a slam dunk feels like an understatement.

Of course it doesn't end there...Jeni's offers a wide variety of interesting flavors. But what they all have in common is fresh ingredients (from happy, grass-fed cows who roam the pastures at a local Ohio creamery). They're all hand packed and bursting with flavor.

brambleberry crisp (another one of my favorites)
Yes, it's a little odd to order ice cream over the internet and have it sent to you in the mail (they pack it in dry ice and it does stay frozen). It also costs more than picking up a pint at your local grocery store. No doubt it's a splurge and not something we do often at my house (I think yesterday was the third time ever). Think of it for a special occasion, maybe for the birthday of an ice cream lover you know).

I do need to give a shout out to another amazing flavor, Salty Caramel. It has this slightly burnt flavor that is just incredible. They somehow managed to push it to the limit, without going over the edge. It's perfect.

These are the latest flavors we tried. The only one I
didn't like was Influenza Sorbet; it was just too strong for
wimpy me (it's made with cayenne and lots of whiskey). But
I could handle the Bourbon Buttered Pecan (which is good).
Here are just a few of the other interesting flavors (I haven't tried all these yet): Queen City Cayenne, Bourbon Buttered Pecan, Goat Cheese with Cognac Fig Sauce, The Buckeye State, Wildberry Lavender, Violets and Meringue, Olive Oil with Sea-Salted Pepitas, Savannah Buttermint, Kir Sorbet and Lime Cardamom Yogurt.

To order your own little pints of heaven on earth: jenisicecreams.com

.

Friday, April 29, 2011

Millet Sunflower Croquettes with Carrot-Ginger Sauce

I enjoy a nice side of rice as much as the next girl, but it's easy to get into a rut when it comes to grains and forget about all the other options out there. Take millet for example. It's tiny and round (you've probably seen it in bird seed or spilling out of a ripped bean bag). It's slightly nutty and mild on its own, so it tends to take on the flavors of whatever is cooked with it.

These vegan croquettes make a nice, light meal (especially when baked). Plus the carrot-ginger sauce adds some fresh zing. If you don't have a vegetable juicer, try your local health food store (they might offer fresh vegetable juice or have carrot juice in the refrigerator). If not, these would taste great with other sauces too (like a nice mushroom sauce maybe).


MILLET SUNFLOWER CROQUETTES
Yield: 8-12 croquettes

1 tablespoon canola oil, plus more for frying
½ cup finely chopped onion
salt
1 cup millet
3 cups water
1/3 cup sunflower seeds, lightly toasted and finely ground
1/4 cup finely chopped parsley


1.      Warm the oil in a medium sauce pan.  Add the onion and 1/4 teaspoon salt and sauté 5-6 minutes over medium heat until soft and translucent.
2.      Add the millet, water and 1 teaspoon salt and bring to a simmer.  Lower the heat and cook covered until the millet has absorbed the water, about 30 minutes.
3.      Transfer the millet to a bowl and let cool.  Stir in the ground sunflower seeds and parsley.
4.      With wet hands, form the millet into croquettes.  Pan fry* croquettes in oil and serve with zesty carrot ginger sauce.

*To bake: Transfer croquettes to a lightly oiled sheet pan. Brush croquettes lightly with oil and bake at 400º F. until crispy, about 20 minutes.

Copyright © Peter Berley. All rights reserved.
cooked onions
raw millet
I forgot to snap a photo of my millet before
I cooked it (this one is from Wikipedia).
water and millet added
cooked millet
sunflower seeds
ground sunflower seeds
chopped parsley
mixing all the ingredients
mixed
formed millet croquette (not cooked yet)
baked millet croquettes

_______________________________________________________


CARROT-GINGER SAUCE
Yield: 2 cups

2 teaspoons extra virgin olive oil
3 scallions (white parts), finely chopped
1 teaspoon finely chopped fresh thyme leaves
1/4 teaspoon sea salt, plus additional to taste
2 cups fresh carrot juice
3/4 teaspoon finely grated fresh ginger
2 teaspoons freshly squeezed lemon juice
1 (2-inch) strip lemon peel
2 tablespoons arrowroot powder
2 teaspoons finely chopped fresh parsley


1.     In a heavy saucepan over medium heat, warm the oil. Add the scallions, thyme, and sea salt. Saute for a minute, cover the pan and cook over the lowest possible heat for 5 minutes. Do not let the scallions brown.
2.     Add the carrot juice, ginger, lemon juice, and lemon peel. Raise the heat and to a boil. Reduce the heat to low and simmer, uncovered, for 2 minutes.
3.     In a small bowl dissolve the arrowroot in 2 tablespoons cold water. Add it to the pan and stir continuously until the sauce thickens. Remove and discard the lemon peel. Add the parsley and simmer for 1 minute. Serve immediately or cool to room temperature and refrigerate. The sauce will keep for up to 2 days.

Copyright © Peter Berley. All rights reserved.

Juiceman juicer and carrots (we used to watch a lot of late night television)
fresh carrot juice
thyme
carrot juice mixture (before arrowroot was added)
thickened sauce (after arrowroot was added)
.

Thursday, April 28, 2011

Spicy Caramelized Cashews

These are a little spicy and a little salty with just a hint of sweetness (I'm a sucker for the salty/sweet combo). Great for serving at a party or as a special snack treat when you're watching the big game.

And talk about easy, I think this took less than ten minutes to make (not including baking). And you can make them ahead of time. You can't beat that.


SPICY CARAMELIZED CASHEWS
Makes 2 cups

vegetable oil or non-stick spray
2 cups unsalted raw cashews (about 10 ounces)
1/4 cup pure maple syrup (preferably Grade B, aka dark for baking)
1 1/2 teaspoons cumin seeds (can substitute 3/4 teaspoon ground cumin)
1 teaspoon fine sea salt
1/4 teaspoon cayenne pepper


1.      Preheat oven to 350° F. Lightly grease a sheet of foil with oil or nonstick spray; set aside. Lightly grease or spray a rimmed baking sheet.
2.      Toss cashews and all remaining ingredients in medium bowl. Spread cashew mixture evenly in single layer on prepared sheet.
3.      Bake nuts until golden brown and coated with maple syrup mixture, stirring occasionally, about 20 minutes. Immediately pour nut mixture out onto foil, spreading evenly. Cool 10 minutes, then separate and break apart any nut clusters. Cool completely.  Can be made 3 days ahead. Store airtight at room temperature.

slightly adapted from Lora Zarubin

raw cashews
raw cashews mixed with maple syrup, cumin, salt and cayenne
raw, coated cashews spread out on a baking sheet
baked and stirred
spread out and cooling
.

Wednesday, April 27, 2011

Broccoli Cheddar Quiche

I was tempted to call this "quick quiche" because I made it with frozen pie crust (gasp). Am I embarrassed to call myself a food blogger? Maybe my inner pastry chef is just a little, but my outer working mom is just trying to get by and makes no apologies. Yes, in a perfect world everything would be organic and made from scratch (and I'd be 5 inches taller and wear a size 8). But I don't live in that world, I live in Jersey.


Getting back to the quiche itself...this recipe is extremely versatile; you can fill it with anything you want. I went with broccoli and cheddar so it would appeal to the younger taste buds at my house. But you can elevate it by choosing fancier fillings (like smoked salmon and asparagus), for when guests with more sophisticated palates stop by.


BROCCOLI QUICHE
Makes 1 (9-inch) quiche

1 cup heavy cream (or half-and-half)
2 eggs
2 pinches salt
a few pinches freshly grated nutmeg
1 frozen 9-inch pie crust

filling:
1-2 tablespoons extra virgin olive oil
2 medium shallots, finely chopped
1 yellow pepper, chopped
2-3 cups steamed broccoli florets
1 cup shredded sharp cheddar cheese


1.      Preheat oven to 350º F.
2.      Heat the olive oil in a small skillet. Add the shallots and cook for 1 minute. Add the yellow pepper and cook until a fork pierces easily, about 5 minutes.
3.      In a medium bowl, combine the cream (or half-and-half) and the eggs. Whisk until combined thoroughly. Add the salt and the nutmeg. Whisk to combine.
4.      Evenly distribute the cooked shallots, pepper and broccoli in the pie crust. Sprinkle the cheese evenly over the top. Pour the cream mixture over the filling (leave a little room; the eggs will puff up during baking).
5.      Bake until firm to the touch (like set jell-o), about 45 minutes. Cool the pie for at least 15 minutes before slicing.

More suggested fillings:
  • cooked spinach, cheddar cheese, cubed cooked ham
  • bacon, sauteed leeks, and gruyere cheese
  • cooked spinach, canned artichoke hearts, and parmesan cheese
  • roasted chicken, goat cheese, and sun-dried tomatoes
adapted from “Refrigerator Pie” by Alton Brown

shallots and yellow pepper cooking
steamed broccoli florets
vegetables in pie crust
cheese sprinkled on top
cream and egg mixture whisked
I whisk it right in the measuring cup, that way it's easy to pour out the spout.
pouring in the cream-egg mixture
ready to bake
I did use a deep dish pie crust, so I had a little extra room.
baked
cross section

Good thing I snapped a photo early because there weren't
any leftovers (always a good sign).
Even my daughter liked it.
,

Tuesday, April 26, 2011

Penne with Vodka Sauce

I used to be kind of turned off to the whole idea of vodka sauce (mainly because I don't like vodka). Then I tasted it and realized it doesn't taste a whole lot like vodka anyway (there's just a hint and it works).

Now if you're worried that serving this to your kids will land you on the local news for getting your toddler drunk, don't be (although that does seem to be a phenomenon of late). But in this case, most of the alcohol burns off during cooking. You'd probably have to guzzle down three or four gallons of the stuff just to get a very small buzz. It's way easier to eat a bowl with penne and have a glass of wine on the side (now if you give the wine to your toddler, you're on your own). And let me add, you deserve to be on the local news.
 

PENNE WITH VODKA SAUCE
Yield: 4 to 5 servings

1/4 cup extra virgin olive oil
1 medium Spanish onion, chopped
3 cloves garlic, minced
1/2 teaspoon crushed red pepper flakes
1 1/2 teaspoons dried oregano
1 cup vodka
2 (28-ounce) cans peeled plum tomatoes (San Marzano if possible)
salt and freshly ground black pepper
3/4 pound penne pasta
1/4 cup chopped fresh oregano
3/4 to 1 cup heavy cream
grated parmesan cheese


1.      Preheat oven to 375º F.
2.      Heat the olive oil in a large oven proof saute pan over medium heat, add the onions and garlic and cook for about 5 minutes until translucent. Add the red pepper flakes and dried oregano and cook for 1 minute more. Add the vodka and continue cooking until the mixture is reduced by half.
3.      Meanwhile, drain the tomatoes through a sieve and crush them into the pan with your hands. Add 2 teaspoons salt and a pinch of black pepper. Cover the pan with a tight fitting lid and place it in the oven for 1 1/2 hours. Remove the pan from the oven and let cool for 15 minutes.
4.      Meanwhile, bring a large pot of salted water to a boil and cook the pasta al dente. Drain and set aside.
5.      Puree the tomato mixture using an immersion blender until the sauce is a smooth consistency.
6.      Reheat the sauce, add 2 tablespoons fresh oregano and enough heavy cream to make the sauce a creamy consistency. Add salt and pepper to taste, and simmer for 10 minutes. Toss the pasta into the sauce and cook for 2 minutes more. Stir in 1/2 cup parmesan. Serve with an additional sprinkle of parmesan and a sprinkle of fresh oregano on each plate.

slightly adapted from Joseph Realmuto, 2009

fresh oregano leaves
onion and garlic cooking
vodka added
vodka reduced
crushing the tomatoes
out of the oven
blending
mixing in the oregano and cream
mostly mixed (nice and pink)
penne draining

.

Monday, April 25, 2011

Lemon Meringue Bites

Come on, you suspected I was up to something when I made lemon curd yesterday, admit it. (You know me so well.) It's been ages since I had lemon meringue and I'm a sucker for cute little individual sized desserts (and hors d'oeuvres while we're on the subject). Plus making these gave me an excuse to fire up my torch, which doesn't happen nearly as often as I'd like. 


The adults at the table loved the tart lemon with the sweet meringue, but my daughter (after happily licking off all the meringue), scrunched her entire face up (like she had just, well, sucked on a lemon) and said "ew, sour!" Oh well, I really thought I had a shot with this one.


LEMON MERINGUE BITES
Makes 48 tartlets

48 sweet tartlet shells, still in the muffin tins (see recipe below)
about 2 cups lemon curd

For meringue
6 large egg whites
1 teaspoon cream of tartar
1 1/2 cups sugar


1.      Fill tartlet shells (still in muffin tins) with lemon curd. Chill tartlets, covered, 1 hour.
2.      Preheat oven to 400° F.  
3.      In a bowl with an electric mixer beat whites with a pinch salt until foamy. Add cream of tartar and beat whites until they hold soft peaks. Gradually add sugar, beating until meringue holds stiff peaks.
4.      Transfer meringue to a pastry bag fitted with 1/2-inch plain tip and pipe meringue 2 inches high onto each tartlet, completely covering lemon curd.
5.      Bake tartlets in middle of oven 3 minutes, or until meringue tips are just browned, and cool in cups on racks. Chill tartlets in airtight containers at least 2 hours, or until cold, and up to 1 day. Keep tartlets chilled until ready to serve.

from Gourmet Magazine, September 1997

filling tarlet shells with lemon curd

It's easiest if you fill a ziploc bag with the lemon curd,
snip off one corner and pipe in the filling.
filled tartlet shells
egg whites, salt & cream of tartar whipped to soft peaks
meringue whipped to stiff peaks
piping the meringue
Instead of baking these in the oven, I reached for my
torch (what can I say, I have an itchy trigger finger).
The meringue might cook more evenly in the oven,
but I kind of like the dramatic swirls you get with the torch.

____________________________________________________________


SWEET TARTLET SHELLS
Makes 48 tartlet shells

2 1/4 sticks (1 cup plus 2 tablespoons) cold unsalted butter
3 cups all-purpose flour
3/4 cup confectioners' sugar
1/2 teaspoon salt
3 large egg yolks
3 tablespoons ice water
1 teaspoon vanilla


1.      Cut butter into bits. In a bowl with a pastry blender or in a food processor blend or pulse flour, confectioners' sugar, and salt until combined well and add butter, blending or pulsing until mixture resembles coarse meal. In a small bowl whisk together yolks, ice water, and vanilla until combined well and add to flour mixture, tossing with a fork or pulsing until incorporated. Form dough into a ball and divide into 2 pieces. Form each piece into a ball and flatten to form disks. Chill disks, wrapped separately in plastic wrap, at least 1 hour and up to 1 week.
2.      Preheat oven to 400° F.  Have 4 mini-muffin pans ready, each with 12 (1 ¾”- x 1” cups).
3.      Form each dough disk into 24 (1-inch) balls. Press dough balls into bottoms and up sides of mini-muffin cups. Trim any overhang with a knife and prick bottoms of shells with a wooden pick. Chill shells 15 minutes, or until firm. Bake shells in middle of oven for 12 minutes, or until golden, and cool in cups on racks (do not remove shells from tins). Tartlet shells may be made 2 days ahead and kept in an airtight container at room temperature.

from Gourmet Magazine, September 1997

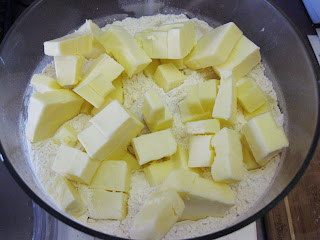
adding the butter to the flour mixture
butter pulsed in
egg yolks with vanilla extract added (don't worry, it's normal
to have specks when you use homemade vanilla extract
,
they're just the seeds from the vanilla beans).
everything added (you can see it's holding together)
It may look too crumbly at first, but if you squeeze a small amount
into a ball and it holds together, you know it's good to go.
dough disk wrapped in plastic wrap
forming the tartlet shells

I didn't bother using a knife to cut the edges after I
formed the shells (I don't mind the rounded look).
baked tartlet shells

.